
'전체 글'에 해당되는 글 384건
- 2019.09.18 자바스크립트에서 replace를 replaceAll 처럼 사용하기
- 2019.09.17 미니 프로젝트
- 2019.09.16 12일차 jQuery
- 2019.09.11 11일차 jQuery
- 2019.09.10 JavaScript - LinkedList, nodeType(재귀), Event 핸들러, DOM
- 2019.09.09 JavaScript - Object 객체, DOM
- 2019.09.08 모듈
- 2019.09.08 객체
- 2019.09.06 JavaScript - 내장함수, 객체, 생성자 함수, 캡슐화, 상속(호출), 기본자료형
- 2019.09.05 JavaScript - 클로저, Scope
자바스크립트에서 replaceAll 은 없다.
정규식을 이용하여 대상 스트링에서 모든 부분을 수정해줄 수 있다.
ex) str.replace("#",""); -> #를 공백으로 변경한다.
하지만 첫번째 # 만 공백으로 변경하고 나머지는 변경이 되지 않는다.
str.replace(/#/gi, ""); -> #를 감싼 따옴표를 슬래시로 대체하고 뒤에 gi 를 붙이면
replaceAll 과 같은 결과를 볼 수 있다.
출처 : http://blog.naver.com/banhong?Redirect=Log&logNo=143384991
'JavaScript' 카테고리의 다른 글
| 정규표현식의 개념과 기초 문법 (4) | 2019.09.18 |
|---|---|
| innerHTML과 outerHTML 차이 (0) | 2019.09.18 |
| 모듈 (0) | 2019.09.08 |
| 객체 (0) | 2019.09.08 |
| 누구나 한 번쯤은 띄워본 JavaScript 에러 TOP 10. (0) | 2019.08.30 |
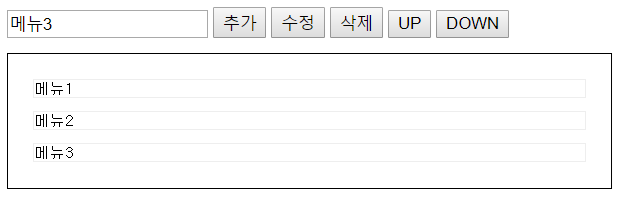
1. 동적 추가 메뉴 만들기 (jQuery) BONUS(Javascript버전(2))
- 추가: input에 입력된 메뉴명을 선택한 Row 하단에 추가
- 수정: 선택한 Row의 메뉴명을 input에 입력한뒤 수정버튼을 클릭하면 메뉴명 수정처리
- 삭제: 선택한 메뉴명 삭제
- UP: 선택한 Row를 상단으로 이동
- DOWN: 선택한 Row를 하단으로 이동
////0. jQuery버전 - 강사님 답
<!DOCTYPE html PUBLIC "-//W3C//DTD Xhtml 1.0 Transitional//EN" "http://www.w3.org/TR/xhtml1/DTD/xhtml1-transitional.dtd">
<html>
    <head>
        <meta http-equiv="Content-Type" content="text/html; charset=UTF-8">
        <title></title>
        <style>
            body {
                font-size: 9pt;
                font-family: "굴림";
            }
            div, p, ul, li {

            }
            ul.menu {
                padding: 10px;
                list-style: none;
                border: 1px #000 solid;
            }
            ul.menu li {
                border: 1px #eeeeee solid;
                margin: 10px;
            }

            li.select {
                background-color: #ccc;
            }
        </style>

        <script src="http://code.jquery.com/jquery-1.10.2.js"></script>
        <script>
            // 전역 변수 선언 및 초기화
            var $menu = null;
            var $menuName = null;
            var $selectedItem = null;
            $(document).ready(function() {
                init();
                initEvent();
            });

            // 전역에서 사용할 요소 초기화
            function init() {
                $menu = $("ul.menu");
                $menuName = $("#menuName");
            }

            // 이벤트 초기화
            function initEvent() {
                // 메뉴 추가
                $("#add").click(function() {
                    addMenu();
                })

                $menu.on("click", "li", function() {
                    selectItem($(this));
                })
                // 업데이트
                $("#update").click(function() {
                    updateMenuItem();
                })
                // 선택 항목 삭제
                $("#remove").click(function() {
                    removeMenuItem();
                })
                // 선택 메뉴 항목을 위로 이동
                $("#up").click(function() {
                    upMenuItem();
                })
                // 선택 메뉴 항목을 아래로 이동
                $("#down").click(function() {
                    downMenuItem();
                })
            }

            // 메뉴 추가 처리
            function addMenu() {
                // 텍스트 입력 값 구하기
                var menuName = $menuName.val();

                // 신규 메뉴 아이템 문자열 만들기
                var newMenuItem = "<li>" + menuName + "</li>";

                // 선택 메뉴 아이템이 있는 경우 신규 메뉴 아이템을 선택 메뉴 아이템 아래에 추가
                if ($selectedItem) {
                    $selectedItem.after(newMenuItem);
                } else {
                    // 메뉴에 신규 메뉴 아이템 추가
                    $menu.append(newMenuItem);
                }
            }

            // 메뉴 선택 처리
            function selectItem($item) {
                // 기존 선택 메뉴 아이템이 있는 경우 선택 효과 제거
                if ($selectedItem != null)
                    $selectedItem.removeClass("select");

                // 신규 선택 메뉴 아이템 처리
                $selectedItem = $item;
                $selectedItem.addClass("select");

            }

            // 메뉴 항목 이름 수정 하기
            function updateMenuItem() {
                if ($selectedItem) {
                    var menuName = $menuName.val();
                    $selectedItem.html(menuName);
                } else {
                    alert("선택 메뉴가 존재 하지 않습니다.")
                }
            }

            // 선택 메뉴 항목 삭제
            function removeMenuItem() {
                if ($selectedItem) {

                    $selectedItem.remove();
                    $selectedItem = null;

                } else {
                    alert("선택 메뉴가 존재 하지 않습니다.")
                }
            }

            // 위로 이동
            function upMenuItem() {
                if ($selectedItem) {
                    var $prevItem = $selectedItem.prev();
                    if ($prevItem)
                        $selectedItem.insertBefore($prevItem);

                } else {
                    alert("선택 메뉴가 존재 하지 않습니다.")
                }
            }

            // 아래로 이동
            function downMenuItem() {
                if ($selectedItem) {
                    var $nextItem = $selectedItem.next();
                    if ($nextItem)
                        $selectedItem.insertAfter($nextItem);
                } else {
                    alert("선택 메뉴가 존재 하지 않습니다.")
                }
            }

        </script>
    </head>

    <body>
        <div>
            <input type="text" id="menuName" />
            <button id="add">
                추가
            </button>
            <button id="update">
                수정
            </button>
            <button id="remove">
                삭제
            </button>
            <button id="up">
                UP
            </button>
            <button id="down">
                DOWN
            </button>

        </div>
        <ul class="menu">

        </ul>
    </body>

</html>
-------------------------------------------------

////1. jQuery버전 - table버전
<!DOCTYPE html>
<html>
<head>
<meta charset="UTF-8">
<title>Insert title here</title>
<script
	src="https://ajax.googleapis.com/ajax/libs/jquery/3.2.1/jquery.min.js"></script>
</head>
<body>


	<input type="text" id="append_row">
	<button type="button" id="add_menu">추가</button>
	<input type="button" id="alter_menu" value="수정">
	<input type="button" id="remove_menu" value="삭제">
	<input type="button" id="up_menu" value="UP">
	<input type="button" id="down_menu" value="DOWN">


	<br>
	<br>
	<!-- 동적 테이블 -->
	<table border="1" id="list_table" style="cursor:pointer">

		<colgroup>
			<!-- column 의 설정을 할수 있다. -->
			<col style="width: 100px;">
		</colgroup>


		<tr><th>Menu</th></tr>


	</table>


	<script type="text/javascript">
	$(document).ready(function(){

	$('#list_table').on("click", "tr", function() {   //table의 tr을 클릭했을 때
	    tableid = $(this).attr('id'); //선택한 tr의 table id를 받아온다.
	    // alert($(this).attr('id'));
	    $("#append_row").val($("#" +tableid).text()); //
	    });


	var cnt = 0;   //추가
		$('#add_menu').on(
				"click",
				function() {   //add_menu버튼을 눌렀을 때
					$('#list_table').append( //table의 가장 아래에 값이 추가되도록 한다.
							$('<tr id='+cnt+'>').append(  //여기서 cnt는 0부터 들어간다
									$('<td>').append($('#append_row').val()),
									));
					cnt += 1;  //추가가 되면 cnt는 1이 증가한다.
					$('#append_row').val('');
				});


		 $("#alter_menu").on("click",function(){  //수정
			   $('#'+tableid).html($("#append_row").val());

			});


		 $('#remove_menu').on("click", function() {  //삭제
			    $('#' + tableid).remove();
			  });


		 $('#up_menu').on("click", function() {  //table list up
			    $('#' + tableid).insertBefore($('#' + tableid).prev());
			  });


		 $('#down_menu').on("click", function() {  //table list down
			    $('#' + tableid).insertAfter($('#' + tableid).next());
			  });

	});


	</script>

</body>
</html>
----------------------------------------------------------------------
////1-1. jQuery - list버전


<!DOCTYPE html>
<html>
<head>
<style type="text/css">
ul{
    list-style-type:none;
    padding-left:0px;
    border : 1px solid black;
    width:420px;
}
li{

    padding: 5px 0px 5px 5px;
    margin-bottom: 5px;
    border-bottom: 1px solid white;
    font-size: 30px;

}
</style>
 <script src="http://code.jquery.com/jquery-latest.js"></script>
 <script>


   $(document).ready(function(){
      $('#ul_list').on("click","li",function() {  //ul 아이디 ul_list에서 li를 클릭했을때
      listId = $(this).attr('id');                //ul_list에서 텍스트에 해당하는 id를 가져옴

   });
      });

var idcnt=0;  //리스트에 추가되는 index값을 0으로 초기화한다.

function add_menu(){
   var text = $("#text").val();  //텍스트 입력값
   var ul_list = $("#ul_list");  //ul_list
   ul_list.append("<li id="+idcnt+">"+$('#text').val()+"</li>");    //li id의 값을 하나씩 증가시켜 저장하고 텍스트를 li 리스트에 추가 저장
   idcnt++;  // 추가 될 때마다 id의 값 하나씩 증가
}

function alter_menu(){
    $("#"+listId).html($("#text").val());  //listid에 저장되어 있는 값을 #text로 새로 입력된 값과 변경
 };

function remove_menu(){    //listid에 저장되어 있는 아이디의 값에 해당하는 텍스트 삭제
   $("#"+listId).remove()
};

function up_menu(){
    $("#"+listId).insertBefore($("#"+listId).prev()); //listid에 저장되어 있는 선택한 아이디의 값과 이전의 값과 위치를 변경
}

function down_menu(){
   $("#"+listId).insertAfter($("#"+listId).next()); //listid에 저장되어 있는 선택한 아이디의 값보다 큰 값과  위치를 변경
}


</script>
<meta charset="UTF-8">
<title></title>
</head>
<body>

<input type = "text" name="text" id="text"/>
<input type = "button" id="insert" onclick="add_menu()" value="추가" />
<input type = "button" id="update" onclick="alter_menu()" value="수정"/>
<input type = "button" id="delete" onclick="remove_menu()" value="삭제"/>
<input type = "button" id="up" onclick="up_menu()" value="UP"/>
<input type = "button" id="down" onclick="down_menu()" value="DOWN"/>

<ul id="ul_list" style="cursor:pointer">

</ul>

</body>
</html>
----------------------------------------------------------------------
////2. javaScript버전

<!DOCTYPE html>
<html>
<head>
<title>Add Edit Remove HTML Table Row</title>
<meta charset="UTF-8">


</head>
<body>

	<div class="container">

		<div class="tab tab-2">
			<input type="text" name="menu" id="menu">
			<button onclick="add_menu();">추가</button>
			<button onclick="alter_menu();">수정</button>
			<button onclick="remove_menu();">삭제</button>
			<button onclick="upNdown('up');">UP</button>
			<button onclick="upNdown('down');">DOWN</button>
		</div>
	</div>
	<br>
	<div class="tab tab-1">
		<table id="table" border="1" style="cursor: pointer">
			<tr>
				<th>MENU</th>
			</tr>

		</table>
	</div>
	<script>
		var rIndex, table = document.getElementById("table"); // html의 아이디가 table인 태그를 rIndex, table 넣어준다.

		function checkEmptyInput() { // input 값이 empty인지 확인
			var isEmpty = false, // input 값이 empty이면 false
			menu = document.getElementById("menu").value; //html의 아이디가 menu인 태그의 값을 menu에 넣어준다

			if (menu === "") {
				alert("Menu Empty"); //input값이 비어 있으면 alert로 "Menu Empty"가 뜨게 한다.
				isEmpty = true;
			}
			return isEmpty;
		}

		function add_menu() { // 메뉴 추가

			if (!checkEmptyInput()) { //input 값이 empty인지 확인한다
				var newRow = table.insertRow(table.length), //새로운 행을 만들어 추가한다.
				cell1 = newRow.insertCell(0), menu = document
						.getElementById("menu").value; //input 값을 메뉴에 담는다.

				cell1.innerHTML = menu; //menu를 html에 뿌려준다.

				selectedRowToInput(); //행이 추가 될때 함수를 설정해준다.
			}
		}

		function selectedRowToInput() { //input text에 입력한 값을 테이블에서 선택하면 보여준다.

			for (var i = 1; i < table.rows.length; i++) {
				table.rows[i].onclick = function() {
					rIndex = this.rowIndex; // 선택된 행의 인덱스를 가져온다
					document.getElementById("menu").value = this.cells[0].innerHTML;

				};
			}
		}
		selectedRowToInput();

		function alter_menu() { //수정
			var menu = document.getElementById("menu").value;
			if (!checkEmptyInput()) {
				table.rows[rIndex].cells[0].innerHTML = menu;

			}
		}

		function remove_menu() { //삭제
			table.deleteRow(rIndex);
			document.getElementById("menu").value = ""; //  input text값을 삭제 한다.

		}

		var index = 0; // 선택된 행 인덱스를 설정하는 변수
		function getSelectedRow() {
			var table = document.getElementById("table");
			for (var i = 1; i < table.rows.length; i++) {
				table.rows[i].onclick = function() {
					if (typeof index !== "undefined") { // 이전에 선택한 행에서 선택한 항목을 지운다
						table.rows[index].classList.toggle("selected");
					}
					index = this.rowIndex;
					this.classList.toggle("selected");

				};
			}
		}

		getSelectedRow();

		function upNdown(direction) {
			var rows = document.getElementById("table").rows, parent = rows[rIndex].parentNode;
			if (direction === "up") {
				if (rIndex > 1) { //index값이 1보다 클 때 실행
					parent.insertBefore(rows[rIndex], rows[rIndex - 1]);// up을 누르면 선택한 인덱스 값은 -1이 된다.
					rIndex--; //인덱스 값을 -1을 해준다
				}
			}

			if (direction === "down") {
				if (rIndex < rows.length - 1) { //선택한 인덱스 값이 전체 row보다 작으면 down을 실행
					parent.insertBefore(rows[rIndex + 1], rows[rIndex]); //down을 누르면 선택한 인덱스 값은 +1이 된다.
					rIndex++; //인덱스 값을  +1을 해준다.
				}
			}
		}
	</script>

</body>
</html>
2. DOM을 이용해 HTML 요소를 간단하게 만들어주는 make 함수 (Javascript)
function make(tagname, attributes, children)
- tagname: tag이름
- attributes: optional, 객체, 프로퍼티와 값
- children: optional, 요소에 추가할 자식, string/element/element배열
///////////////// 주어진 문제만 처리가능한 유틸 version!

<!DOCTYPE html>
<html>
<head>
<meta charset="UTF-8">
<title>DOM을 이용해 HTML 요소를 간단하게 만들어주는 make 함수</title>
</head>
<script type="text/Javascript">

//문제
function ex1(){
	var body = document.getElementsByTagName('body')[0];
	var div = make("div", {'style':'background-color:red;', 'id':'div1'}, "hello world");
	body.appendChild(div);
	var tds = [make("td",{},"Name"), make("td",{},"Type"), make("td",{},"Value")];
	var tr = make("tr",{}, tds);
	var table = make("table", {'style':'border: 1px solid red;'}, tr);
	body.appendChild(table);
}

// tagname: tag이름
// attributes: optional, 객체, 프로퍼티와 값
// children: optional, 요소에 추가할 자식, string/element/element배열
function make(tagname, attributes, children){
  	var td = document.createElement('td'); // 전역변수로 사용하기 위해 선언
  	var tr = document.createElement('tr');

  	//tag name이 div일경우
	if(tagname == "div"){
		var tag = document.createElement(tagname); // tagname값 받아 div생성
		tag.setAttribute("style",attributes.style); // style적용
		tag.setAttribute("id", attributes.id); // id 적용

		if(typeof children == 'string'){ // object이면 (객체인지 일반 String type인지 체크해서 거르기!)
      		var text = document.createTextNode(children); // text노드만들기
		    tag.appendChild(text);
      	} else { // string이면
      		tag.innerHTML = children; // children 값 tag에 넣음
      	}
		return tag;

	//tagname이 tr, td 일경우
	}else if(tagname == "td" || tagname == "tr"){ // tr, td생성
		var tag = document.createElement(tagname); // tagname값 받아 tr, td생성
		tag.innerHTML = children; // tr : <tr><td>Name</td>,<td>Type</td>,<td>Value</td></tr>
		return tag.outerHTML; // inner가 아닌 outer로 tag까지 포함하도록 리턴.

	// tagname이 table 일 경우
	} else {
		var tag = document.createElement(tagname); // tagname값 받아 table생성
		tag.setAttribute("style",attributes.style);  // style적용
		tag.setAttribute("id", attributes.id); 	// id적용
		var n_child = children.replace(/,/gi, ""); // replaceAll 효과 , /,/gi -> 정규식
		tag.appendChild(tr); // table에 tr appendChild
		tag.innerHTML = n_child; // innerHTML : html요소의 안쪽값을 n_child로 한다.
		return tag; //table 리턴위해 tag만 리턴.

	}

}

</script>
<body>

	<div>
		<button onClick="ex1()">출력</button>
	</div>

</body>
</html>

------------------------------------------

///////////////// 모든 tag 처리가능한 유틸 version!

<!DOCTYPE html>
<html>
<head>
<meta charset="UTF-8">
<title>Insert title here</title>
<style>
  table {
    width: 100%;
    border: 1px solid #333333;
  }
  td {
    padding: 10px;
    border: 1px solid #333333;
  }
  .a {
    border-collapse: separate;   /* 간격존재 */
    /*border-collapse: collapse; */  /* 간격제거 */
  }
</style>
<script>

// 주어진 tagname과 attributes, children을 사용하여 HTML 엘리먼트를 생성한다
// - tagname: Tag이름
// - attributes: 객체, 프로퍼티 이름과 값, optional
// - children: string/element/element배열, 엘리먼트에 추가할 자식, optional
// 예) make("p", {border:1}, "<tr><td>11</td><td>22</td></tr>")
function make(tagname, attributes, children){
	// 두 개의 전달인자를 사용하여 호출했다면, attributes 전달인자는 배열이거나 문자열이다
	// 이 경우 children 전달인자는 attributes가 되어야 한다
	if(arguments.length == 2 &&
		(attributes instanceof Array || typeof attributes == "string")){
		children = attributes;
		attributes = null;
	}

	// 엘리먼트를 생성한다
	var e = document.createElement(tagname);

	// 어트리뷰트를 설정한다
	if(attributes){
		for(var name in attributes) e.setAttribute(name, attributes[name]);
	}

	// children이 주어졌으면 이를 추가한다
	if(children != null){
		if(children instanceof Array){
			for(var i = 0; i < children.length; i++){
				var child = children[i];
				if(typeof child == "string") // 텍스트 노드를 처리
				   child = document.createTextNode(child);
				e.appendChild(child); // 다른 것들은 Node가 아니라고 가정
			}
		}
		else if(typeof children == "string") // 단일 텍스트 자식을 처리
		    e.appendChild(document.createTextNode(children));
		else e.appendChild(children); // 그 외 단일 자식을 처리한다
	}

	return e; // 엘리먼트 반환
}

// 주어진 태그를 위해 make()를 호출하는 함수를 반환
// var table = maker("table");
function maker(tag){
	return function(attrs, kids){
		if(arguments.length == 1) return make(tag, attrs);
		else return make(tag, attrs, kids);
	}
}

function test(){
	var body = document.getElementsByTagName('body')[0];

	var div = make("div", {'style':'background-color:red;', 'id':'div1'}, "hello world");
	body.appendChild(div);

	var tds = [make("td",{},"Name"), make("td",{},"Type"), make("td",{},"Value")];
	var tr = make("tr",{}, tds);

	var table = make("table", {'style':'border: 1px solid red;'}, tr);
	body.appendChild(table);
}
</script>
</head>
<body onload="test()">

</body>
</html>
3-1. 이진탐색트리 알고리즘
<!DOCTYPE html>
<html>
<head>
<script type="text/javascript">
	function Node(data, left, right) { //각 노드는 2개의 자식노드를 가짐
		this.data = data; //노드의 값
		this.left = left; //노드의 작은자식
		this.right = right; //노드의 큰자식
	}

	function BSTree() { //이진트리함수
		this.root = null; //트리의 뿌리노드(1개만 존재)
		this.insert = insert; //노드추가
		this.inOrderSearch = inOrderSearch; //전위
		this.preOrderSearch = preOrderSearch; //중위
		this.postOrderSearch = postOrderSearch; //후위
		this.min = findMin; //최소값
		this.max = findMax; //최대값
	}

	function insert(data) { //삽입
		var node = new Node(data, null, null); //노드 인스턴스 생성
		if (this.root == null) {
			this.root = node; //뿌리 노드가 없을 시 새로운 노드가 뿌리가 됨
		} else {
			var current = this.root; //뿌리부터 시작하여 current data값과 들어온 data값을 비교함
			var parent;
			while (true) { //자식이 없을 때 까지 반복
				parent = current;
				if (data < current.data) { //들어온 data가 더 작을 때
					current = current.left;
					if (current == null) {
						parent.left = node;
						break;
					}
				} else { //들어온 data가 더 클 때
					current = current.right;
					if (current == null) {
						parent.right = node;
						break;
					}
				}
			}
		}
	}

	//중위
	function inOrderSearch(printNode) {
		inOrder(tree.root, printNode);
	}
	function inOrder(node, printNode) {
		if (node != null) {
			inOrder(node.left, printNode);
			printNode(node.data + ' ');
			inOrder(node.right, printNode);
		}
	}

	//전위
	function preOrderSearch(printNode) {
		preOrder(tree.root, printNode);
	}
	function preOrder(node, printNode) {
		if (node != null) {
			printNode(node.data + ' ');
			preOrder(node.left, printNode);
			preOrder(node.right, printNode);
		}
	}

	//후위
	function postOrderSearch(printNode) {
		postOrder(tree.root, printNode);
	}
	function postOrder(node, printNode) {
		if (node != null) {
			postOrder(node.left, printNode);
			postOrder(node.right, printNode);
			printNode(node.data + ' ');
		}
	}

	//최소값
	function findMin() { //가장 왼쪽에 있는 data를 가져옴
		var current = this.root;
		while (current.left != null) {
			current = current.left;
		}
		return current.data;
	}
	//최대값
	function findMax() { //가장 오른쪽에 있는 data를 가져옴
		var current = this.root;
		while (current.right != null) {
			current = current.right;
		}
		return current.data;
	}

	var tree = new BSTree();
	tree.insert(11);
	tree.insert(7);
	tree.insert(15);
	tree.insert(5);
	tree.insert(3);
	tree.insert(9);
	tree.insert(8);
	tree.insert(10);

	function printNode(value) {
		console.log(value);
	}

	console.log('*** 중위 순회 ***');
	tree.inOrderSearch(printNode);

	console.log('*** 전위 순회 ***');
	tree.preOrderSearch(printNode);

	console.log('*** 후위 순회 ***');
	tree.postOrderSearch(printNode);

	console.log('********* 최대/최소값 ***********');
	console.log(tree.max());
	console.log(tree.min());
</script>
<meta charset="UTF-8">
<title>Insert title here</title>
</head>
<body>

</body>
</html>
3-2. 하노이 알고리즘
<!DOCTYPE html>
<html>
<head>
<script src="https://code.jquery.com/jquery-1.12.4.js"></script>
<script type="text/javascript">

//스택 생성자 함수
function Stack(n) {
	this.name = n
    this.dataStore = []; //스택요소를 저장하는 배열
    this.top = 0;
    this.push = function push(element) {
        this.dataStore[this.top++] = element; //현재 top위치에 새요소를 추가한 다음 top이 증가
    };
    this.pop = function pop() {
        return this.dataStore[--this.top]; //스택의 탑 위치에 있는 요소를 반환한 다음 top변수를 감소
    };
    this.length = length;
}

	var source = new Stack('A');	// A
	var helper = new Stack('B');	// B
	var dest = new Stack('C');		// C
	source.push(3);
	source.push(2);
	source.push(1);		//3 2 1

	var string = "";
	 function towerOfHanoi(n, source1, helper1, dest1) {	//하노이 알고리즘 기본원리는

		if (n === 1) {									//n-1개의 데이터를 A->B로 옮긴 후
			string+=source1.name+"->"+dest1.name+" // ";

			dest.push(source1.pop());					//1개의 데이터를 A->C로,
		}												//다시 n-1개를 B->C 옮김
		else {
			towerOfHanoi(n - 1, source1, dest1, helper1);	//재귀함수로 호출
			string+=source1.name+"->"+dest1.name+" // ";
			dest.push(source1.pop());
			towerOfHanoi(n - 1, helper1, source1, dest1);
		}
	}
	towerOfHanoi(3, source, helper, dest);
console.log(string);
</script>
<meta charset="UTF-8">
<title>Insert title here</title>
</head>
<body>

</body>
</html>
4. 달력 그리기
<HTML>
<HEAD>
<meta charset="UTF-8">
<TITLE></TITLE>
<SCRIPT LANGUAGE="JavaScript">
// 시간을 읽어와서 '오전/오후 시:분' 형태로 구해주는 함수
function get_Time(){
var now = new Date();
var hour = now.getHours();
var minute = now.getMinutes();
var ampm;
if(hour >= 12){
hour -= 12;
ampm = "오후";
}
else{
ampm = "오전";
}
hour = (hour == 0) ? 12 : hour;
if (minute < 10)
minute = "0" + minute;
return ampm + hour + ":" + minute;
}
// 년과 월을 받아서 마지막 일을 계산해주는 함수
function get_Day(year, month){
var Last_Mon = new Array(31, 29, 31, 30, 31, 30, 31, 31, 30, 31, 30, 31);
var Mon2;
// ==>윤년 체크
if (year % 4 == 0)
Mon2 = true;
if (year % 100 ==0)
Mon2=false;
if (year % 400 ==0)
Mon2=true;
Last_Mon[1] = (Mon2) ? 29 : 28;
return Last_Mon[month];
}
// table을 이용하여 달력을 만들어 줍니다.
function drawCal(firstDay, lastDate, date, year, monthName)
{
var text = "";
text += "<CENTER>";
text += "<TABLE>";
text += "<TH COLSPAN=7 BGCOLOR=#FFFFCC>";
text += "<FONT COLOR=midnightblue SIZE=+3 >";
// 년과 월을 출력합니다.
text += year + "년 " + (monthName + 1) + "월";
text += "</FONT>";
text += "</TH>";
var openCol = "<TD BGCOLOR=#FFEEFF WIDTH=45 HEIGHT=40> ";
openCol += "<FONT COLOR=darkblue> ";
var closeCol = "</FONT></TD>";
text += "<TR ALIGN=center VALIGN=center>";
var weekDay = new Array("일", "월", "화", "수", "목", "금", "토");
// 달력의 일, 월, 화, 수, 목, 금, 토, 일을 출력합니다.
for (var dayNum = 0 ; dayNum <= 6 ; dayNum++)
text += openCol + weekDay[dayNum] + closeCol;
text += "</TR>";
var digit = 1; // Drawing중인 달력의 현재위치
var curCell = 1;
// 달력 표를 만들어 줍니다.
for (var row = 1 ; row <= Math.ceil((lastDate + firstDay - 1) / 7) ; ++row){ // 주
console.log("주-digit:"+digit);
console.log("주-curCell:"+curCell);
text += "<TR ALIGN=right VALIGN=top BGCOLOR=#FFEFEE>"; // 주의시작
for (var col = 1; col <= 7; col++){ // 일
console.log("일-digit:"+digit);
console.log("일-curCell:"+curCell);
// 마지막주 빈칸을 만들어줌
if (digit > lastDate){
n=(Math.ceil((lastDate + firstDay - 1) / 7))*7-(curCell+lastDate-1);
for(var i=1 ; i<=n ; i++);
text += "<TD> </TD>";
break;
}
// 일이 시작되는 칸을 만들어줌
if (curCell < firstDay){
text += "<TD> </TD>";
curCell++;
}
else{
if (digit == date){
text += "<TD HEIGHT=40>";
text += "<FONT COLOR=Red>";
text += digit;
text += "</FONT><BR>";
text += "<FONT COLOR=purple SIZE=2>";
text += "<CENTER>" + get_Time() + "</CENTER>";
text += "</FONT>";
text += "</TD>";
}
else text += "<TD HEIGHT=40>" + digit + "</TD>";
digit++;
}
}
text += "</TR>";
}
text += "</TABLE>";
text += "</CENTER>";
return text;
}
</SCRIPT>
</HEAD>
<BODY>
<SCRIPT LANGUAGE="JavaScript">
<!--
var now = new Date();
var year = now.getYear();
var month = now.getMonth();
var date = now.getDate();
var my_text;
// 익스플로러가 아니면 '1900'을 'year'에 붙여 줍니다.
if(navigator.userAgent.indexOf("MSIE") == -1)
year= 1900 + year
var firstDayInstance = new Date(year, month, 1);
var firstDay = firstDayInstance.getDay()+1;
firstDayInstance = null;
var days = get_Day(year,month); // 달의 마지막 일을 구합니다.
my_text = drawCal(firstDay, days, date, year, month);
// 최종적으로 만들어진 HTML문서를 브라우저에 출력합니다.
document.write(my_text);
// -->
</SCRIPT>
</BODY>
</HTML>5. 동적 Tree 메뉴
<HTML>
<HEAD>
<meta charset="UTF-8">
<STYLE>
body
{
background-color: #FFFFFF;
color: #333333;
font-family: "굴림", "Verdana";
font-size:10pt;
line-height:150%;
}
table
{
color: #333333;
font-family: "굴림", "Verdana";
font-size:10pt;
line-height:150%;
}
A:link { font-size:10pt; font-family:"굴림";color:#565656; text-decoration:none; }
A:visited { font-size:10pt; font-family:"굴림";color:#565656; text-decoration:none; }
A:active { font-size:10pt; font-family:"굴림";color:#FF6000; text-decoration:none; }
A:hover { font-size:10pt; font-family:"굴림";color:#FF6000;text-decoration:none; }
</STYLE>
<script src="http://code.jquery.com/jquery-latest.min.js"></script>
<script type="text/javascript">
function init(){
//createtree 생성후 div 로 아이디 받아옴
var tree = new CreateTree(document.getElementById('div'));
// 메뉴객체 생성
// name : a 태그에 나타나는 내용
// href : a 태그에 사용될 URL
// icon : 기본 아이콘 대신할 아이콘 URL
// child : 자식배열
//root객체, root객체는 실제로 보이지 않는다
var data = {"name":"name","href":"A링크","target":"target","icon":"","child":[]};
//자식개체를 하나 생성
var childA = {"name":"관리자메뉴","href":"","target":"","icon":"menu02.gif","child":[]};
var childB = {"name":"직원메뉴","href":"","target":"","icon":"menu02.gif","child":[]};
var childC = {"name":"관리자메뉴","href":"","target":"","icon":"menu02.gif","child":[]};
var childD = {"name":"임시메뉴","href":"","target":"","icon":"menu02.gif","child":[]};
//자식1를 자식 배열에 push
data.child.push(childA);
data.child.push(childB);
data.child.push(childC);
data.child.push(childD);
//자식1의 하위개체를 생성
var childA1 = {"name":"부하직원조회","href":"https://www.w3schools.com","target":"_blank","icon":"menu01.gif","child":[]};
var childA2 = {"name":"결재승인","href":"https://www.w3schools.com","target":"_blank","icon":"menu01.gif","child":[]};
var childA3 = {"name":"결재내역조회","href":"https://www.w3schools.com","target":"_blank","icon":"menu01.gif","child":[]};
var childB1 = {"name":"결재신청","href":"https://www.w3schools.com","target":"_blank","icon":"menu01.gif","child":[]};
var childB2 = {"name":"급여정보조회","href":"https://www.w3schools.com","target":"_blank","icon":"menu01.gif","child":[]};
var childB3 = {"name":"인사정보조회","href":"https://www.w3schools.com","target":"_blank","icon":"menu01.gif","child":[]};
var childC1 = {"name":"기준관리","href":"https://www.w3schools.com","target":"_blank","icon":"menu01.gif","child":[]};
var childC2 = {"name":"근무현황조회","href":"https://www.w3schools.com","target":"_blank","icon":"menu01.gif","child":[]};
var childC3 = {"name":"평가현황조회","href":"https://www.w3schools.com","target":"_blank","icon":"menu01.gif","child":[]};
var childD1 = {"name":"임시1","href":"https://www.w3schools.com","target":"_blank","icon":"menu01.gif","child":[]};
//자식1의 하위객체 push
childA.child.push(childA1);
childA.child.push(childA2);
childA.child.push(childA3);
childB.child.push(childB1);
childB.child.push(childB2);
childB.child.push(childB3);
childC.child.push(childC1);
childC.child.push(childC2);
childC.child.push(childC3);
childD.child.push(childD1);
//트리에 메뉴객체를 연결
tree.data_init(data);
//트리메뉴를 화면에 보여준다
tree.createView();
}
//CreateTree에서 매게 변수 받아오기
function CreateTree(doc){
//데이터 있는 div 를 doc 에받아옴
var div = doc;
this.data_init = function(data){
for(var i in data.child){
// doc 에 img div 새로 생성
var newDiv = document.createElement("div");
var newImg = document.createElement("img");
//data 객체 에 child 를 불러옴
var c = data.child[i];
newDiv.append(c.name);
newDiv.setAttribute('id',"menu_"+i);
newDiv.setAttribute('href',c.href);
newDiv.setAttribute('child',c.child);
newImg.setAttribute('src',c.icon);
newDiv.prepend(newImg);
var c1 = c.child;
// 자식 배열불러와서
for(var j in c1){
var newDiv2 = document.createElement("div");
var newImg2 = document.createElement("img");
var A = document.createElement("A");
newDiv2.setAttribute('class','toggle'); //토글 될 메뉴들에 toggle 클래스명 추가
A.innerHTML = c1[j].name;
A.setAttribute('href',c1[j].href);
A.setAttribute('target',c1[j].target);
newImg2.setAttribute('src',c1[j].icon);
newDiv2.innerHTML=" ";
newDiv2.append(newImg2);
newDiv2.append(A);
newDiv.append(newDiv2);
}
div.append(newDiv);
}
//토글속성 삽입을 위하여 생성
for(var i in data.child){
new toggleMenu(i);
}
}
//페이지 로딩시 토글메뉴 hide 처리
this.createView = function(){
$('.toggle').hide();
}
}
//아이콘 클릭시 토글아이콘 변경
function toggleImg(menu){
if($(menu).attr('src')=='menu02.gif'){
$(menu).attr('src', 'menu03.gif');
}else if($(menu).attr('src')=='menu03.gif'){
$(menu).attr('src', 'menu02.gif');
}
}
//클릭시 toggle클래스들에 토글기능 추가
function toggleMenu(index){
console.log(index);
$("#menu_"+index+">img").click(function(){
toggleImg("#menu_"+index+">img");
$("#menu_"+index+">.toggle").toggle('slow');
});
}
</script>
</HEAD>
<BODY OnLoad="init()">
<DIV ID="div"></DIV>
</BODY>
</HTML>'Bitcamp > BITCAMP - Front Web' 카테고리의 다른 글
| 6일차 JavaScript (0) | 2020.07.15 |
|---|---|
| IBSheet 그리드 특강 (0) | 2019.09.26 |
| 12일차 jQuery (0) | 2019.09.16 |
| 11일차 jQuery (0) | 2019.09.11 |
| JavaScript - LinkedList, nodeType(재귀), Event 핸들러, DOM (0) | 2019.09.10 |
0916 과제
<!DOCTYPE html PUBLIC "-//W3C//DTD Xhtml 1.0 Transitional//EN" "http://www.w3.org/TR/xhtml1/DTD/xhtml1-transitional.dtd">
<html>
<head>
<meta http-equiv="Content-Type" content="text/html; charset=UTF-8">
<title> </title>
<style>
body{
font-size:9pt;
}
.panel {
width:840px;
height:415px;
border:1px solid #ccc;
}
.nav {
width:840px;
text-align:center;
}
button {
margin-top:5px;
padding:5px;
}
</style>
<script src="http://code.jquery.com/jquery-1.10.2.js"></script>
<script>
$(document).ready(function(){
var n = 1;
var change; // setInterval 변수 선언. clearInterval에서 사용해야함.
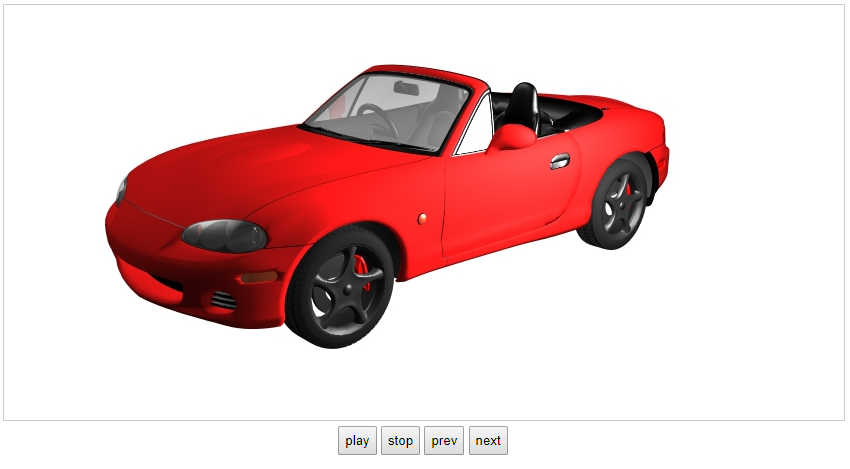
// 360도 돌음.(이미지 60개 : 번호 1개씩 증가시켜서 빙빙 돌게하면 됨)
$("#play").click(function(){
play();
});
// 이전 사진 1개씩
$("#prev").click(function(){
prev();
});
// 다음 사진 1개씩
$("#next").click(function(){
next();
});
function play(){
var n = $('img').attr('src').substr(0,0); // 사진이름의 숫자를 변수 n으로 선언
change = setInterval(function(){
if(n>59){ // 60장초과시 1로 초기화
n = 1;
$('img').attr('src','car_images/'+n+'.jpg');
} else {
n++;
$('img').attr('src','car_images/'+n+'.jpg');
}
}, 500);
}
$("#stop").click(function(){
clearInterval(change);
});
function prev(){
n--;
if(n==0){ // 이전으로 돌아갈시 60으로 초기화
n=60;
}
$('img').attr('src','car_images/'+n+'.jpg');
}
function next(){
n++;
if(n==60){ // 60개 도달시 1개로 초기화
n=1;
}
$('img').attr('src','car_images/'+n+'.jpg');
}
})
</script>
</head>
<body>
<div class="panel">
<img src="./car_images/1.jpg" id="view">
</div>
<div class="nav">
<button id="play">play</button>
<button id="stop">stop</button>
<button id="prev">prev</button>
<button id="next">next</button>
</div>
</body>
</html>
jQuery this 정리
<%@ page language="java" contentType="text/html; charset=UTF-8"
    pageEncoding="UTF-8"%>
<!DOCTYPE html>
<html>
<head>
<meta charset="UTF-8">
<title>this 정리</title>
<script src="http://code.jquery.com/jquery-latest.js"></script>
<script>

/*javaScript에서의 this 정리*/
// 일반함수에서 this : window 객체
// 중첩함수에서 this : window 객체
// 이벤트에서 this : 이벤트를 발생시킨 객체
// 메소드에서 this : 메소드를 호출한 객체
// 메소드 내부 중첩함수에서 this : window 객체 (예외케이스라 암기해야함) ★★★★★

//예제: 일반함수에서 this
	var data=10;
	function outer(){
	   this.data=20; // this는 Window객체
	   data=30;
	   document.write("1. data1 ="+data,"<br>");  //1. data = 30         -- 전역변수
	   document.write("2. this.data = "+this.data,"<br>"); // 2. this.data = 30   -- 전역변수
	   document.write("3. window.data = "+window.data,"<br>"); // 3. window.data = 30 -- 전역변수
	}
	outer();

// 예제: 일반중첩함수에서의 this
	var data=10;
	function outer(){
	   // 중첩함수
	   functioninner(){
	        this.data=20;
	        data=30;
	        document.write("1. data1 = "+data,"<br>"); //1. data = 30         -- 전역변수
	        document.write("2. this.data = "+this.data,"<br>"); // 2. this.data = 30   -- 전역변수
	        document.write("3. window.data = "+window.data,"<br>"); // 3. window.data = 30 -- 전역변수
	   }
	   inner();
	}
	outer();

// 예제: 이벤트리스너에서 this
	var data=10;
	$(document).ready(function(){
	   // 이벤트리스너 등록
	   $("#myButton").click(function(){
	        this.data=20;
	        data=30;
	        console.log("1. data1 ="+data); // 1. data = 30         -- 전역변수
	        console.log("2. this.data = "+this.data); // 2. this.data = 20   -- 이벤트 발생시킨 객체
	        console.log("3. window.data = "+window.data); // 3. window.data = 30 -- 전역변수
	   });
	});

// 예제: 메서드에서 this
	var data=10;
	function MyClass() { // 클래스 정의
	   this.data=0; // 프로퍼티 정의
	}
	MyClass.prototype.method1 =function(){ // 메서드 정의
	   this.data=20;
	   data=30;
	   console.log("1. data1 = "+data); // 1. data = 30         -- 전역변수
	   console.log("2. this.data = "+this.data); // 2. this.data = 20   -- 메서드를 호출한 객체
	   console.log("3. window.data = "+window.data); // 3. window.data = 30 -- 전역변수
	}
	var my1 = new MyClass(); // 인스턴스 생성
	my1.method1(); // 메서드 호출

// 예제: 메서드내부 중첩함수에서 this
	var data=10; // 클래스 정의
	function MyClass() { // 프로퍼티 정의
	   this.data=0;
	}
	MyClass.prototype.method1=function(){ // 메서드 정의
	   function inner(){
	        this.data=20;
	        data=30;
	        console.log("1. data1 ="+data); // 1. data = 30         -- 전역변수
	        console.log("2. this.data = "+this.data); // 2. this.data = 30   -- 전역변수
	        console.log("3. window.data = "+window.data); // 3. window.data = 30 -- 전역변수
	   }
	   inner();
	}
	var my1 = new MyClass(); // 인스턴스 생성
	my1.method1(); // 메서드 호출

</script>
</head>
<body>

 <button id="myButton">리스너실행</button>

</body>
</html>
0916 실습
<%@ page language="java" contentType="text/html; charset=UTF-8"
    pageEncoding="UTF-8"%>
<!DOCTYPE html>
<html>
<head>
<meta charset="UTF-8">
<title>실습0916</title>
<style>

	div{
		width: 50px;
		height: 50px;
		background-color:orange;
		position: relative;
	}

	.outer{
		width: 200px;
		height: 200px;
		background: orange;
		padding: 50px;
		margin: 10px;
	}

	.inner{
		width: 100%;
		height: 100%;
		background: red;
	}

</style>
<script src="http://code.jquery.com/jquery-latest.js"></script>
<script>

	/*문서객체조작*/
	// remove() : 문서객체를 제거(instance 1개씩)
	$(document).ready(function(){
		// $('h1').first().remove(); // 포그바헤딩 사라짐
		// $('div').empty(); //empty() : 문서객체 내부를 비움(전부)
		// $('p').append($('strong')); // p요소 안으로 strong 이동
		$('h1').after($('p')); // h1요소 뒤로 p 이동
	});

	//text노드가 없는 문서객체 생성 - 속성을 입력하는 다른 방식
	$(document).ready(function(){
		$('<img/>',{
			src:'car_images/1.jpg',
			width: 350,
			height: 250
		}).appendTo('body');
		// $('<img/>').attr(src:'car_images/1.jpg').appendTo('body'); 로 쓸수도 있다.
	});

	/*문서 객체 추가 : 좋은 sample 예제임 ★★★★★★★ */
	//append : 요소 뒤에 컨텐츠/요소 추가
	//prepend : 요소 내용 끝에 컨텐츠/요소 추가
	//after : 요소 뒤에 컨텐츠/요소 추가
	//before : 요소 내용 끝에 컨텐츠/요소 추가
	$(document).ready(function(){
		var content = [
			{name: '포그바', region:'프랑스'},
			{name: '굴리트', region:'네덜란드'},
			{name: '에우제비오', region:'포루투칼'},
		];
		$('div').append(function(index){ // div가 부모
			var item = content[index];
			var output = '';
			output +='<h1>' + item.name + '</h1>';
			output +='<h2>' + item.region + '</h2>';
			return output;
		});
	});

	/*문서객체복제 - clone */
	$(document).ready(function(){
		$('span').clone().appendTo('h1');
		$("button").click(function(){
			$('body').append($("p:first").clone(true));
		})
		$("p").click(function(){
			$(this).animate({fontsize: "+=1px"});
		});
	});

	// 좋은 예제 tr, td ★★★★★★★ - 자바스크립트 과제시 사용하게 될것.
	$(document).ready(function(){
		var cloneEle = $(".testTd").clone(); // 선택한 요소를 복사
		cloneEle.text("B1"); // 복사한 요소의 text 변경

		$(".testTr").append(cloneEle); // 복사한 요소를 tr의 자식 요소로 추가
		/*테이블의 행에 hover 이벤트를 부착*/
		$(".testTr").hover(function(){
			$(this).css("background","#c9c9c9");},
			function(){
				$(this).css("background","#fff");
			});
			$('#btnAction').on("click",function(e){
				var c1 = $('#t1 tr:eq(0)').clone(true);
				$("#t1").append(c1);
		});
	});

	/*매개변수 context : 특정부분에 선택자를 적용하고 싶을 때 사용*/
	//context는 selector가 적용하는 범위를 한정
	// event와 함께 사용.
	$(document).ready(function(){
		$('div').click(function(){
			var header = $('h1', this).text(); // h1 tag를 선택하는데 this 범위 내로 한정
			var paragraph = $('p', this).text();
			alert(header + '\n' + paragraph);
		});
	});

	/*이벤트 객체 - canvas*/
	// 캔버스처럼 마우스로 선을 그릴수 있음?
	$(document).ready(function(){
		var canvas = document.getElementById('canvas');
		var context = canvas.getContext('2d');
		$(canvas).on({
			mousedown: function(event){ // canvas 위치정보
				var position = $(this).offset();
				var x = event.pageX - position.left;
				var y = event.pageY - position.top;

				context.beginPath(); // 경로생성
				context.moveTo(x,y); // 시작좌표
			},
			mouseup: function(event){ // canvas 위치정보를 얻어냄
				var position = $(this).offset();
				var x = event.pageX - position.left;
				var y = event.pageY - position.top;

				context.lineTo(x, y); // 끝좌표
				context.stroke(); // 선을 그리다.
			},
		});
	});

	/*Event 강제발생*/
	// triger :  이벤트를 강제로 발생시킨다.
	$(document).ready(function(){
	 $('h1').click(function(event, data1, data2){
	   alert(data1 + ':' + data2);
	 });
	 $('h1').eq(1).trigger('click',[273, 52]); // 이벤트를 강제로 발생시킴
	});
	// preventDefault : 기본 이벤트를 제거
	$(document).ready(function(){
	 $("a").click(function(event){
	   event.preventDefault();
	 });
	});
	// stopPropagation : 이벤트 전달을 제거
	$(document).ready(function(){
	 $("span").click(function(event){
	   event.stopPropagation();
	   alert("The span element was clicked.");
	 });
	});
	/*Event Trigger 예제*/
	$(document).ready(function(){
		$("span").on("eventTest",function(event){
			console.log("The Span element.");
		});
		$("p").on("eventTest",function(event){
			console.log("The p element.");
		});
		$("div").on("eventTest",function(event){
			console.log("The div element.");
		});
		$("button").click(function(){
			$("span").trigger("eventTest");
		});
	})

	/*마우스 이벤트*/
	// mouseout(요소를 벗어날때), mouseover : 이벤트 버블링 발생O
	// mouseleave(경계내부->경계외부), mouseenter : 이벤트 버블링 발생X
	$(document).ready(function(){
		$('.outer').mouseover(function(){
			$('body').append('<h1>MOUSEOVER</h1>'); // MOUSEOVER : 요소안으로 들어올때
		}).mouseenter(function(){
			$('body').append('<h1>MOUSEENTER</h1>'); //  MOUSEENTER : 경계외부 -> 경계내부
		});
	});

	/*키보드 이벤트*/
	// keyup : 키보드를 뗄 때 발생
	// keydown : 키 입력시 발생
	// keypress : 키 입력시 발생. 한글지원안함. alt ctrl shift esc 호출안됨
	$(document).ready(function(){
		$('textarea').keyup(function(){
			var inputLength = $(this).val().length; // 남은 글자수를 구함
			var remain = 150 - inputLength;
			$('h1').html(remain); // html() : 문서객체의 내부추가. 문서 객체에 입력
			if(remain >= 0){
				$('h1').css('color', 'black');
			} else {
				$('h1').css('color', 'red');
			}
		})
	})

	/*윈도 이벤트
	ready : 문서객체가 준비완료되면
	load : 문서객체를 불러들일때 발생
	unload : 문서객체를 닫을 때 발생 ~ 사용자들 complian 관련 이슈 많음.
	resize : 윈도의 크기를 변경시킬 때 발생
	scroll : 윈도를 스크롤할 때 발생
	error : 에러가 있을 때 발생
	*/
	$(document).ready(function(){ // 무한 스크롤
		$(window).scroll(function(){ // 스크롤 이벤트 발생 시
			var scrollHeight = $(window).scrollTop() + $(window).height();
			var documentHeight = $(document).height();
			// 스크롤의 높이와 문서의 높이가 같을 때 10줄을 추가
			if(scrollHeight == documentHeight){
				for(var i =0; i < 10; i++){
					$('<h1>Infinity Scroll</h1>').appendTo('body');
				}
			}
		});
	});
	//테스트를 위해 내부에 공간을 채워둠.
	$(document).ready(function(){
		for(var i=0; i<20; i++){
			$('<h1>Infinity Scroll</h1>').appendTo('body');
		}
	});

	/*입력양식 이벤트*/
	// attr : HTML의 Attribute(tag안의 string값을 가져옴)
	// prop : javascript Property(실제 속성 값을 가져옴.)
	//change 예제
	$(document).ready(function(){
		$('#all-check').change(function(){
			if(this.checked){
				$('#check-item').children().prop('checked', true);
			} else {
				$('#check-item').children().prop('checked', false);
			}
		});

		var $checkbox = $('#chk');
    	  console.log($checkbox.attr('checked')); // checked : checked해도 값의 변화가 없음.
	      console.log($checkbox.prop('checked')); // true
	});

	/*기본시각효과*/
	//toggle 효과 예제
	$(document).ready(function(){
		$('button').click(function(){
			$('page').toggle('show'); // show와 hide가 반복호출
		});
	});

	// 사용자 정의 효과
	$(document).ready(function(){
		$('div').hover(function(){
			$(this).animate({
				left: 500 // left로 500 이동이 애니메이션처럼
			},'slow');
		}, function(){
			$(this).animate({
				left: 0
			}, 'slow');
		});
	});

	//animate 예제
	$(document).ready(function(){
		$("#btn").click(function(){
			$("#box").animate({
				width: "400px"
			}, {
				duration: 5000,
				easing: "linear",
				step: function(x){ // 한 단계마다 함수호출
					$("#demo").text(Math.round(x*100/400)+"%");
				}
			});
		});
	});

</script>
</head>
<body>
<!--
	<br><br>------------------remove() empty()----------------<br><br>
	<h1>포그바 헤딩</h1>
	<h1>지단 헤딩</h1>
	<br><br>------------------p요소 안으로 strong 이동----------------<br><br>
	<p>헤딩슛 </p>
	<strong>골</strong>
	<br><br>------------------h1요소 뒤로 p 이동----------------<br><br>
	<p>날강두</p>
	<h1>빠염</h1>

	<br><br>------------------문서 객체 추가----------------<br><br>
	<div></div>
	<div></div>
	<div></div>

	<br><br>------------------문서 객체 복제----------------<br><br>
	<div>
		<h1></h1>
		<p><span>박지성</span></p>
	</div>
	<button>글자크기 증가</button>

	<br><br>------------------좋은 예제 tr, td----------------<br><br>
	<table id="t1">
	   <tr class="testTr">
	      <td class="testTd">A1</td>
	   </tr>
	 </table>
	 <br/>
	 <input type="button" value="행추가" id="btnAction">

	<br><br>------------------/*이벤트 객체 - canvas*/----------------<br><br>
	<canvas id="canvas" width="700" height="400" style="border: 5px solid black">
	</canvas>

	<br><br>------------------/*Event Trigger 예제*/----------------<br><br>
	<div style="height:100px;width:500px;background-color:lightblue;">
	  This is a div element.
	 <p style="background-color:pink">This is a p element <br>
	   <span style="background-color:orange">This is a span element</span>
	 </p>
	</div>
	<button>Event Trigger</button>

	<br><br><a href="https://naver.com">-----------------/*마우스 이벤트*/----------------</a><br><br>
	<div class="outer">
		<div class="inner"></div>
	</div>

	<br><br>------------------/*키보드 이벤트*/---------------<br><br>
	<div>
		<p>지금 내 생각을</p>
		<h1>150</h1>
		<textarea cols="70" rows="5">/</textarea>
	</div>


	<br><br>------------------/*입력양식 이벤트*/ - change 예제---------------<br><br>
	<input type="checkbox" name="" id="chk" checked="checked">
	<input type="checkbox" id="all-check"/>
	<label>ALL</label>
	<div id="check-item">
		<input type="checkbox"/>
		<label>A option</label>
		<input type="checkbox"/>
		<label>B option</label>
		<input type="checkbox"/>
		<label>C option</label>
	</div>

	<br><br>------------------기본시각효과 - toggle 효과 예제---------------<br><br>
	<button>toggle show</button>
	<div class="page">
		<h1>77억</h1>
		<p>Alexis Sanchez</p>
	</div>

	<br><br>------------------문서 객체 추가----------------<br><br>
	<div></div>
	<div></div>
	<div></div>-->

	<br><br>------------------//animate 예제----------------<br><br>
	<button id="btn">Start Progress Bar</button>
	 <div style="border:1px solidgreen;margin:10px;width:400px;">
	   <div id="box"style="background:#98bf21;height:50px;width:1px;border:1px solidgreen;"></div>
	 </div>
	 <p id="demo"></p>


</body>
</html>
jQuery 슬라이드 예제
<!DOCTYPE html>
<html>
<head>
    <style>
        * { margin:0px; padding:0px; }
        /* Animation Canvas */
        .animation_canvas  {
            overflow:hidden;
            position:relative;
            width:600px; height:400px;
        }

        /* Slider Panel */
        .slider_panel { width:3000px; position:relative; }
        .slider_image { float:left; width:600px; height:400px; }

        /* Slider Text Panel */
        .slider_text_panel { position:absolute; top:200px; left:50px; }
        .slider_text { position:absolute; width:250px; height:150px; }

        /* Control Panel */
        .control_panel  {
            position:absolute; top:380px;
            left:270px; height:13px;
            overflow:hidden;
        }

        .control_button {
            width:12px; height:46px;
            position:relative;

            float:left; cursor:pointer;
            background:url('point_button.png');
        }
        .control_button:hover { top:-16px; }
        .control_button.active { top:-31px; }
    </style>
    <script src="http://code.jquery.com/jquery-1.10.2.js"></script>
    <script>
        $(document).ready(function () {
            // 슬라이더를 움직여주는 함수
            function moveSlider(index) {
                // 슬라이더를 이동합니다.
                var willMoveLeft = -(index * 600);
                $('.slider_panel').animate({ left: willMoveLeft }, 'slow');

                // control_button에 active클래스를 부여/제거합니다.
                $('.control_button[data-index=' + index + ']').addClass('active');
                $('.control_button[data-index!=' + index + ']').removeClass('active');

                // 글자를 이동합니다.
                $('.slider_text[data-index=' + index + ']').show().animate({
                    left: 0
                }, 'slow');
                $('.slider_text[data-index!=' + index + ']').hide('slow', function () {
                    $(this).css('left', -300);
                });
            }

            // 초기 텍스트 위치 지정 및 data-index 할당
            $('.slider_text').css('left', -300).each(function (index) {
                $(this).attr('data-index', index);
            });

            // 컨트롤 버튼의 클릭 핸들러 지정 및 data-index 할당
            $('.control_button').each(function (index) {
                $(this).attr('data-index', index);
            }).click(function () {
                var index = $(this).attr('data-index');
                moveSlider(index);
            });

            // 초기 슬라이더 위치 지정
            var randomNumber = Math.round(Math.random() * 5);
            moveSlider(randomNumber);
        });
    </script>
</head>
<body>
    <h1>Test Header</h1>
    <div class="animation_canvas">
        <div class="slider_panel">
            <img src="Desert.jpg" class="slider_image"/>
            <img src="Hydrangeas.jpg" class="slider_image"/>
            <img src="Jellyfish.jpg" class="slider_image"/>
            <img src="Koala.jpg" class="slider_image"/>
            <img src="Lighthouse.jpg" class="slider_image"/>
        </div>
        <div class="slider_text_panel">
            <div class="slider_text">
                <h1>Lorem ipsum</h1>
                <p>Lorem ipsum dolor sit amet, consectetur adipiscing elit.</p>
            </div>
            <div class="slider_text">
                <h1>Nulla eget</h1>
                <p>Nulla eget sapien mauris, ornare elementum elit.</p>
            </div>
            <div class="slider_text">
                <h1>Quisque eleifend</h1>
                <p>Quisque eleifend augue nec lacus lobortis porta.</p>
            </div>
            <div class="slider_text">
                <h1>Donec</h1>
                <p>Donec a ligula lectus, eu iaculis justo.</p>
            </div>
            <div class="slider_text">
                <h1>Vivamus scelerisque</h1>
                <p>Vivamus scelerisque mauris id nunc dictum sit amet.</p>
            </div>
        </div>
        <div class="control_panel">
            <div class="control_button"></div>
            <div class="control_button"></div>
            <div class="control_button"></div>
            <div class="control_button"></div>
            <div class="control_button"></div>
        </div>
    </div>
    <h1>Test Header</h1>
</body>
</html>
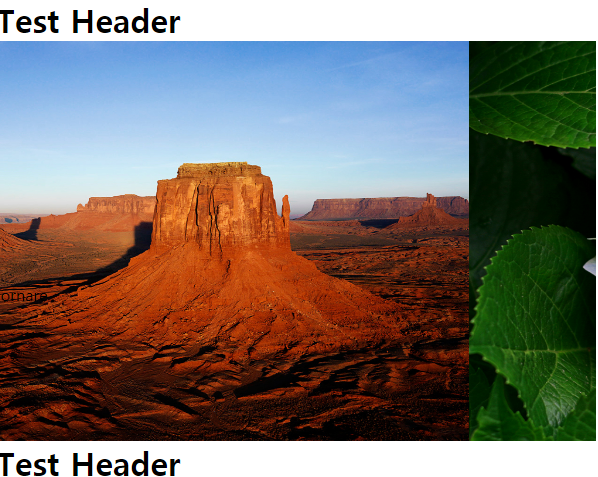
화면이 슬라이드 스르륵
'Bitcamp > BITCAMP - Front Web' 카테고리의 다른 글
| IBSheet 그리드 특강 (0) | 2019.09.26 |
|---|---|
| 미니 프로젝트 (0) | 2019.09.17 |
| 11일차 jQuery (0) | 2019.09.11 |
| JavaScript - LinkedList, nodeType(재귀), Event 핸들러, DOM (0) | 2019.09.10 |
| JavaScript - Object 객체, DOM (0) | 2019.09.09 |
<%@ page language="java" contentType="text/html; charset=UTF-8"
pageEncoding="UTF-8"%>
<!DOCTYPE html>
<html>
<head>
<meta charset="UTF-8">
<title>0911 실습</title>
<script type="text/Javascript">
/*0911 실습 - 리스트의엘리먼트를 알파벳 순으로 정렬 */
function sortkids(e){
var array = [];
var list = document.getElementsByTagName("li");
for(var i = 0; i<list.length; i++){
array.push(list[i].childNodes[0].nodeValue); // nodeValue : 텍스트 노드의 값을 가져온다.
console.log(array[i]);
}
array.sort(); // 알파벳순으로 정렬
for(var i =0; i<list.length; i++){ // 화면에 뿌려줌.
list[i].innerHTML = array[i]; // innerHTML : html요소에 접근하여 화면에 바꿔 출력하게 해줌.
}
/*
for(var i =0; i<array.length; i++){ // 화면에 뿌려줌.(결과값만 나오게 뿌리기)
document.write("<li>" + array[i] + "</li>");
}*/
}
</script>
</head>
<body>
<ul id='list'>
<li>c</li><li>b</li><li>a</li><li>d</li>
</ul>
<button onclick="sortkids('list')">Sort list</button>
</body>
</html>
==================================
<%@ page language="java" contentType="text/html; charset=UTF-8"
pageEncoding="UTF-8"%>
<!DOCTYPE html>
<html>
<head>
<meta charset="UTF-8">
<title>jQuery 선택자 예제</title>
<script src="http://code.jquery.com/jquery-latest.js"></script>
<script>
// $(document).ready() : window.onload, body.onload와 같은기능.
// $(document).ready(function(){ -> $(function(){ 으로 축약가능
/*기본선택자*/
// 자손선택자 : body > *
// 두가지 클래스 : .item.select
// 후손선택자 : body *
// 속성선택자
// 'span[name |= "tag"]' 특정값과 일치하고 연결된 값이 따름.
// 'span[name ~= "tag"]' 특정값과 일치하는 단어가 있는 문서객체를 선택.(단어체크)
// 'span[name ^= "tag"]' 특정값으로 시작하는 문서객체를 선택.
// 'span[name $= "tag"]' 특정값으로 끝나는 문서객체를 선택.
// 'span[name *= "tag"]' 특정값을 포함하는 문서객체를 선택.(값체크)
// 'span[name != "tag"]' 속성값이 불일치하는 문서객체를 선택.
/*input 요소의 타입*/
// input : 모든 input요소
// text, password, radio, checkbox, submit, reset, button, image, file
/* jQuery 선택자 예제 */
$(document).ready(function(){
$("button").click(function(){
$(this).hide(); /*나 자신 - 버튼자신을 숨김*/
$("p.intro").hide(); /*.intro를 class로 가지는 p태그를 hide 시킴*/
$(":button").hide(); /* button tag or input type이 button인 태그*/
});
});
$(document).ready(function(){
$("button").click(function(){
$("ul li:first").hide(); /*ul자손 모든 li중 첫번째 - list1의 coffee만*/
$("ul li:first-child").hide(); /* ul별로 첫번째 li - list1,2 모든 coffee만 */
});
});
//짝수 테이블
$(document).ready(function(){
$("tr:even").css("background-color","yellow");
$( "input:disabled" ).val( "this is it" );
});
/* jQuery 선택자 예제2 */
// wrap : 뒤에 있는 태그를 앞에잇는 태그로 감싸는 것
$(document).ready(function(){
$(":checked").wrap("<span style='background-color:red'>");
$("input").focus(); // input태그에 focus를 주고
$(":focus").css("background-color","yellow"); //focus에 css속성을 부여
});
/*jQuery 함수필터 선택자 예제2*/
// 선택요소 배열로 리턴
$(document).ready(function(){
// var jb = $('li').get(); // div에 선택요소 배열로 리턴
var jb = $( 'li' ).get(0); // 0번째요소를 리턴
//for(var i=0; i< jb.length; i++){
// $('div').append('<p>' + jb[i].innerHTML + '</p>');
// div에 선택요소 배열로 리턴
$('div').append('<p>' + jb.innerHTML + '</p>');
// 0번째요소를 리턴
});
// 부모요소 div.cd가 있어야 적용
$(document).ready(function(){
$('p.ef').parent('div.cd').css('color', 'red');
});
// 형제 siblings
$(document).ready(function(){
$(".me").siblings().css({"border": "2px solid red"});
});
</script>
</head>
<body>
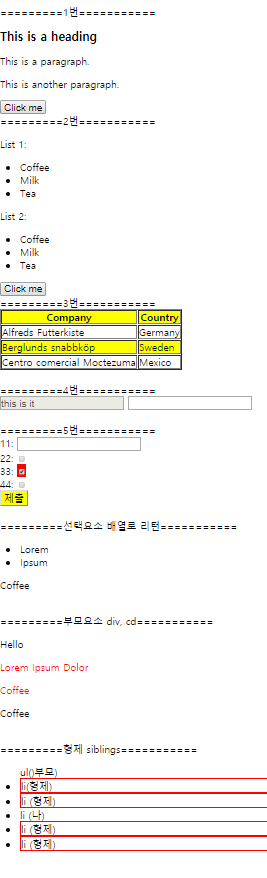
<br>=========1번===========<br>
<h2 class="intro">This is a heading</h2>
<p class="intro">This is a paragraph.</p>
<p>This is another paragraph.</p>
<button>Click me</button>
<br>=========2번===========<br>
<p>List 1:</p>
<ul>
<li>Coffee</li>
<li>Milk</li>
<li>Tea</li>
</ul>
<p>List 2:</p>
<ul>
<li>Coffee</li>
<li>Milk</li>
<li>Tea</li>
</ul>
<button>Click me</button>
<br>=========3번===========<br>
<table border="1">
<tr>
<th>Company</th>
<th>Country</th>
</tr>
<tr>
<td>Alfreds Futterkiste</td>
<td>Germany</td>
</tr>
<tr>
<td>Berglunds snabbköp</td>
<td>Sweden</td>
</tr>
<tr>
<td>Centro comercial Moctezuma</td>
<td>Mexico</td>
</tr>
</table>
<br>=========4번===========<br>
<form>
<input type="email" disabled="disabled">
<input name="id">
</form>
<br>=========5번===========<br>
<form action="">
11: <input type="text" name="user"><br>
22: <input type="checkbox"name="vehicle"><br>
33: <input type="checkbox" name="vehicle"checked="checked"><br>
44: <input type="checkbox"name="vehicle"><br>
<input type="submit">
</form>
<br>=========선택요소 배열로 리턴===========<br>
<ul>
<li>Lorem</li>
<li>Ipsum</li>
</ul>
<div></div>
<br>=========부모요소 div, cd===========<br>
<div class="ab">
<p>Hello</p>
<div class="cd">
<p class="ef">
Lorem Ipsum Dolor
</p>
</div>
</div>
<br>=========형제 siblings===========<br>
<ul>ul()부모)
<li>li(형제)</li>
<li>li (형제)</li>
<li class="me">li (나)</li>
<li>li (형제)</li>
<li>li (형제)</li>
</ul>
</body>
</html>
<%@ page language="java" contentType="text/html; charset=UTF-8"
    pageEncoding="UTF-8"%>
<!DOCTYPE html>
<html>
<head>
<meta charset="UTF-8">
<title>jQuery 함수필터 선택자 예제</title>
<script src="http://code.jquery.com/jquery-latest.js"></script>
<style>
/*
	.high-light-0{background:yellow;}
	.high-light-1{background:orange;}
	.high-light-2{background:blue;}
	.high-light-3{background:green;}
	.high-light-4{background:red;}
*/
</style>
<script>
	/* jQuery 함수필터 선택자 예제 */
	$(document).ready(function(){
	 // $("p:nth-child(3)").css("background-color","yellow"); // 23, 33
	  // $("p:first-of-type").css("background-color", "yellow"); // 12, 22, 31
	   // $("p:first-child").css("background-color", "yellow"); // 31
	   $("p:first").css("background-color", "yellow"); // 12
	});

	//gt('index') 는 요소 집합에서 index 보다 큰 색인을 가지고 있는 요소들을 반환해 줍니다.
	$(document).ready(function(){
		 $("tr:gt(1)").css("background-color", "yellow"); // 1보다 큰곳에 css 적용
		 $(":empty").css("background-color","blue"); // empty : 빈곳에 css적용
		 $("tr:eq(0)").css("background-color","green"); // eq : n번째에 위치하는 문서객체 선택. 첫번째줄
		 $("td:nth-child(3n+1)").css("background-color","gray"); // 1, 4
		 $("td:nth-child(3n+2)").css("background-color","orange"); // 2, 5
		 $("td:nth-child(3n)").css("background-color","red"); // 0, 3
	});

	/*배열관리*/
	$(document).ready(function(){
		//$(selector).each(function(index, item){}
		//h1 요소들에 대해 각각 콜백함수 실행
		$('h1').each(function(index, item){
			$(this).addClass('high-light-' + index); // class 속성을 추가
		});
	});


	/*객체확장*/
	// $.extend(object, addObject, addObject...): 객체에 속성을 계속 추가(합침)
	// object에 addObejct들을 합친다.
		//a에 b를 merge하고 그 결과에 c를 merge
		var a = {
				name : '굴리트',
				gender : 'Male',
				role : '검은 튤립'
		};

		var b = {
				name : '포그바',
				gender : 'Male',
				role : '댄서바'
		};
		var c = {
				name : '지단',
				age : 40
		};
		$.extend(a,b,c);
		console.log(a); // {name: "지단", gender: "Male", role: "댄서바", age: 40}

		// a에 b를 merge하는데 원소스 유지
		var newobject = $.extend({}, a, b);
		console.log(newobject); // {name: "포그바", gender: "Male", role: "댄서바", age: 40}

		// property가 object일때
		// deepCopy : $.extend(true, d, e)
		// 객체의 각속성을 비교해서 없는 속성만 copy. true를 앞에 붙여줌.
		var d = {
		   style: {
		       top: 100,
		       left: 200,
		       width: 300
		   },
		   duration: 1000
		};

		var e = {
		   style: {
		       height: 400
		   }
		};
		$.extend(d, e); // // /*duration: 1000 style: {height: 400}
 		$.extend(true, d, e); // duration: 1000 style: {top: 100, left: 200, width: 300, height: 400}
		console.log(d);

		/*문서객체 선택과 탐색*/
		// end() : 문서객체 선택취소
		$(document).ready(function(){
			// 홀수번째는 흰색, 짝수번째는 빨강
			//$('h1').css('background', 'orange');
			//$('h1:even').css('color', 'white');
			// $('h1:odd').css('color', 'red');
			// end함수 사용 : 마지막에 선택한 것을 취소. 선택한 filter(:odd)을 취소
			$('h1').css('background', 'orange').filter(':even').css('color', 'white').end().filter(':odd').css('color', 'blue');
		});

		// add예제
		//p와 div에 같은 css 적용
		$(document).ready(function(){
			$("p").add("div").css({"border":"2px solid white"});
			// p를 선택하고 추가로 이전인 div#after도 추가
			// addBack : 이전요소도 add에 포함
			$("div#after").find("p").addBack().css({"backgroundColor": "aqua"});
		});

		/*find 예제*/
		$( document ).ready( function() {
   			$( 'p.b' ).find( 'span.ip' ).css( 'font-size','2em');
   			// p 클래스가 b인것중 / span 클래스의 ip 를 find
		});


</script>
</head>
<body>

	<br>=========함수필터 선택자 예제===========<br>
	<h1>11:This is a heading inbody</h1>
	<p>12:AAAAAAAAA</p>
	<p>13:BBBBBBBBB</p>
	<div style="border:1pxsolid;">
	 <span>21:This is a span element in div</span>
	 <p>22:AAAAAAAAA</p>
	 <p>23:BBBBBBBBB</p>
	 <p>24:CCCCCCCC</p>
	</div><br>
	<div style="border:1pxsolid;">
	 <p>31:AAAAAAAAA</p>
	 <p>32:BBBBBBBBB</p>
	 <p>33:CCCCCCCC</p>
	</div>
	<p>14:CCCCCCCCC</p>

	<br>=========함수필터 선택자 예제2===========<br>
	<table border="1">
	 <tr>
	   <th>Company</th>
	   <th>Contact</th>
	   <th>Country</th>
	 </tr>
	 <tr>
	   <td>Alfreds Futterkiste</td>
	   <td>Maria Anders</td>
	   <td>Germany</td>
	 </tr>
	 <tr>
	   <td>Berglunds snabbköp</td>
	   <td>Christina Berglund</td>
	   <td>Sweden</td>
	 </tr>
	  <tr>
	   <td></td>
	   <td>Christina Berglund</td>
	   <td>Sweden</td>
	 </tr>
	  <tr>
	   <td>Alfreds Futterkiste</td>
	   <td>Maria Anders</td>
	   <td></td>
	 </tr>
	  <tr>
	   <td></td>
	   <td>포그바</td>
	   <td>굴리트</td>
	 </tr>
	  <tr>
	   <td></td>
	   <td>und</td>
	   <td>den</td>
	 </tr>
	 </table>

	 <br>=========/*배열관리*/===========<br>
	  <h1>item - 0</h1>
	  <h1>item - 1</h1>
	  <h1>item - 2</h1>
	  <h1>item - 3</h1>
	  <h1>item - 4</h1>


	 <br>=========add 예제===========<br>
	 <p>안녕하세요.</p>
	<span>날강두입니다.</span>
	<div>반갑습니다.</div>
	<div id="after">
	 <p>.addBack() 적용 후</p>
	 <p>안녕하세요. 메시입니다.</p>
	</div>

	<br>=========/*find 예제*/===========<br>
	<p class="a">
	   <span class="lo">Lorem</span>
	   <span class="ip">Ipsum</span>
	   <span class="do">Dolor</span>
	 </p>
	 <p class="b">
	   <span class="lo">Lorem</span>
	   <span class="ip">Ipsum</span>
	   <span class="do">Dolor</span>
	 </p>

</body>
</html>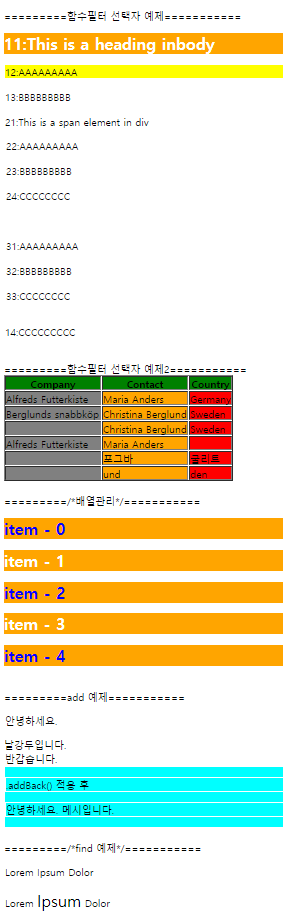
'Bitcamp > BITCAMP - Front Web' 카테고리의 다른 글
| 미니 프로젝트 (0) | 2019.09.17 |
|---|---|
| 12일차 jQuery (0) | 2019.09.16 |
| JavaScript - LinkedList, nodeType(재귀), Event 핸들러, DOM (0) | 2019.09.10 |
| JavaScript - Object 객체, DOM (0) | 2019.09.09 |
| JavaScript - 내장함수, 객체, 생성자 함수, 캡슐화, 상속(호출), 기본자료형 (0) | 2019.09.06 |
JavaScript - LinkedList, nodeType(재귀), Event 핸들러, DOM
| Bitcamp/BITCAMP - Front Web 2019. 9. 10. 17:13<%@ page language="java" contentType="text/html; charset=UTF-8"
pageEncoding="UTF-8"%>
<!DOCTYPE html>
<html>
<head>
<meta charset="UTF-8">
<title>0910 실습</title>
<style>
.cls1{
color: red;
}
</style>
<script type="text/Javascript">
/* 0910실습 */
function LinkedList(){ // stack 생성자 함수
var list = function(a){
this.a = a;
this.next = null; // 다음
};
var head = null; // 머리
var length = 0; // 연결리스트에 담긴 데이터의 갯수
this.append = function(a){ // 마지막에 삽입
var node = new list(a), current; // current는 마지막 node
if(head == null){ // 머리가 없으면
head = node; // 머리가 노드
} else { // 머리가 있으면
current = head; //
while(current.next != null){ // 마지막 원소를 발견할 때까지 루프 순환
current = current.next;
}
current.next = node; // 마지막 원소를 링크할 수 있게 다음 노드에 할당.
}
length++; // 리스트의 크기를 업데이트 한다.
};
this.insert = function(pos, a){ // 특정 index에 추가
// index가 개입되면 범위체크는 필수
if(pos>=0 && pos <= length){ // 범위 이외의 값인지 체크한다.
var node = new list(a),
current = head,
pre, index=0;
if(pos === 0){ // 첫번째로 추가
node.next = current; // 리스트의 중간 또는 맨끝에 추가하는 경우
head = node; // 머리가 노드
} else { // 머리가 있으면
while(index++ < pos){
prev = current;
current = current.next;
}
node.next = current;
prev.next = node;
}
length++;
return true;
} else {
return false;
}
};
this.removeAt = function(pos){ // 데이터 위치를 기준으로 삭제
if(pos>=0 && pos <= length){ // 범위 이외의 값인지 체크한다.
var current = head,
pre, index=0;
if(pos === 0){ // 첫번째 원소 삭제
head = current.next;
} else {
while(index++ < pos){
prev = current;
current = current.next;
}
prev.next = current.next; // 현재의 다음 과 이전을 연결: 삭제하기 위해 건너뜀.
}
length--;
return current.a;
} else {
return null;
}
};
this.remove = function(a){ // 데이터값을 기준으로 삭제
var index = this.indexOf(a);
return this.removeAt(index);
};
this.indexOf = function(a){ // value의 index를 리턴
var current = head, index = 0;
while(current){
if(a === current.a){
return index;
}
index++;
current = current.next;
}
return -1;
};
this.toString = function(){
var current = head, str = '';
while(current){
str += current.a;
current = current.next;
}
return str;
};
this.print = function(){
var current = head, str = '';
if(head == null){
console.log("출력할 리스트가 존재하지 않습니다.");
} else {
str += '[';
while(current.next != null){
str += current.a + " ";
current = current.next;
}
str += current.a;
str += ']';
console.log(str);
}
};
}
// 1. LinkedList 객체를 만들기
function question1(){
var list = new LinkedList();
list.append(15); // 맨뒤에 추가
list.print(); // = 15
console.log(list.indexOf(15)); // value의 index를 리턴 = 0
list.append(10); // 15 10
list.print(); // 15 10
console.log(list.indexOf(10)); // 1
list.append(13); // 15 10 13
list.print(); // 15 10 13
console.log(list.indexOf(13)); // 2
console.log(list.indexOf(10)); // 1
list.append(11); // 15 10 13 11
list.append(12); // 15 10 13 11 12
list.print(); // 15 10 13 11 12
console.log(list.removeAt(1)); // 특정 index를 삭제 여기서 15=0 10=1 10을 삭제한다
list.print() //15 13 11 12
console.log(list.removeAt(3)); // 12를 삭제한다.
list.print(); // 15 13 11
list.append(14); // 15 13 11 14
list.print(); //15 13 11 14
list.insert(0, 16); // 특정 index에 추가 0번째에 16을 추가한다
list.print(); // 16 15 13 11 14
list.insert(1, 17); // 1번째에 17을 추가한다.
list.print(); // [16 17 15 13 11 14]
}
/* nodeType */
// 노드가 요소, 텍스트, 속성 중 어느 타입의 노드인지를 리턴
// 요소노드 : 1, 속성노드 : 2, 텍스트노드 : 3
//DOM예제
function myFunction(){
var textnode = document.createTextNode("Water");
var item = document.getElementById("myList").childNodes[0]; // childNodes 어레이 리턴
item.replaceChild(textnode, item.childNodes[0]);
// child를 바꿔라 / textnode : new / item.childNodes[0] : old
// child가 water로 바뀜
}
// 문서의 노드순회
function countTags(n){
var numtags = 0;
if(n.noteType == 1) // 요소노드냐?
numtags++;
var children = n.childNodes;
for(var i=0; i<children.length; i++){
numtags+= countTags(children[i]); // recursive 재귀호출
}
return numtags;
}
// 노드 아래의 모든 텍스트 얻기
// text노드를 이어 붙이고 문자열로 반환
function getText(n){
var strings = [];
getStrings(n, Strings);
return strings.join(" ");
function getStrings(n, strings){
if(n.nodeType == 3){ // textnode면 push
strings.push(n.data);
}else if(n.nodeType == 1){ // 요소노드면 첫번째 자식을 찾고
for(var m= n.firstChild; m!=null; m=m.nextSibling){ // 다음 노드를 찾으면서 재귀호출
//
getStrings(m, strings);
}
}
}
}
/*Event 예제*/
function test1(){ // c b a ( 자식노드 -> 부모노드, 기본값 false)
document.getElementById('a').addEventListener('click',function(){console.log('a')});
document.getElementById('b').addEventListener('click',function(){console.log('b')});
document.getElementById('c').addEventListener('click',function(){console.log('c')});
}
function test2(){ // a b c ( 부모노드 -> 자식노드, true)
document.getElementById('a').addEventListener('click',function(){console.log('a')}, true);
document.getElementById('b').addEventListener('click',function(){console.log('b')}, true);
document.getElementById('c').addEventListener('click',function(){console.log('c')}, true);
}
function test3(){ // c b (stopPropagation : 이벤트 전파차단)
document.getElementById('a').addEventListener('click',function(){console.log('a')});
document.getElementById('b').addEventListener('click',function(evt){evt.stopPropagation(); console.log('b')}); // 이후부터 이벤트차단
document.getElementById('c').addEventListener('click',function(){console.log('c')});
}
/*이벤트 핸들러 추가하기*/
// onload 후에 추가하고자 하는 메소드가 있을 경우엔 다음과 같이 처리할 수 있다.
window.onload = prepareGallery; // 하나의 함수등록
window.onload = function(){ // 함수가 여러개일때
firstFunction();
secondFunction();
}
// 위의 소스는 실체 onload와 연결된 소스를 함수가 추가될 때마다 수정해주어야한다.
// 이에 대한 해결책으로 addLoadEvent 기법을 사용하면 좋다
// ★★★★ 모든 브라우저에서 사용 가능한 이벤트 핸들러 등록방식 - 많이 응용해서 쓰인다. ★★★★
function addLoadEvent(func){
var oldonload = window.onload; // onload event에 연결된 메소드를 얻어온다.
if(typeof window.onload !='function'){ // type이 function이 아니면, onload에 연결된 함수없으면
window.onload = func; // 다른 function이 연결되어 있지 않으므로 그냥 연결
} else {
window.onload = function(){
oldonload(); // 이전에 onload에 연결되었던 func를 호출한다.
func();
}
}
}
addLoadEvent(firstFunction);
addLoadEvent(secondFunction);
/*실행시에 마크업 코드 생성하기 - DOM사용*/
// 실습예제 : <p>이것은<em>텍스트</em>입니다.</p>
var para = document.createElement("p");
var txt1 = document.createTextNode("이것은");
console.log(para.appendChild(txt1)); // 이것은
var emphasis = document.createElement("em");
var txt2 = document.createTextNode("텍스트");
console.log(emphasis.appendChild(txt2)); //텍스트
console.log(para.appendChild(emphasis)); // <em>텍스트</em>
var txt3 = document.createTextNode("입니다.");
console.log(para.appendChild(txt3)); // 입니다.
/*DOM예제2*/
function test(){
var sp1 = document.createElement("span");
var sp2 = document.getElementById("childElement");
var parentDiv = sp2.parentNode;
parentDiv.insertBefore(sp1, sp2); // 앞에 span 태그 생김.
}
function test4(){
var myobj = document.getElementById("demo");
myobj.remove(); // 노드제거
}
function test5(){
document.getElementsByTagName("H1")[0].removeAttribute("class"); // 속성제거
}
function test6(){
var list = document.getElementById("myList2");
list.removeChild(list.childNodes[0]); // child제거
}
/*DOM 문제 - 모든 textNode의 데이터를 대문자로 변경*/
function upcase(n){
if(n.nodeType == 3){ // 노드가 text노드이면 텍스트를 대문자로 바꾼다.
n.data = n.data.toUpperCase(); // data 대신 value로 써도됨.
} else { // 현재 노드가 text노드가 아니면 각 자식에 대해 재귀적으로 호출
var kids = n.childNodes;
for(var i=0; i<kids.length; i++)
upcase(kids[i]);
}
}
/* CSS와 DOM연동하기 - 특정 노드에 style 주기*/
function styleHeaderSiblings(){
if(!document.getElementsByTagName) return false;
var headers = document.getElementsByTagName("h1"); // 모든 h1 tag를 얻는다.
for(var i=0; i<headers.length; i++){
//첫번째 요소노드에 css지정
var elem = getNextElement(headers[i].nextSibling); // nextSibling -> 다음 요소노드로 이동
elem.style.fontWeight = 'bold';
elem.style.fontSize = "1.2em";
}
}
//다음 요소노드가 나올 때까지 재귀호출
function getNextElement(node){
if(node.nodeType == 1)
return node;
if(node.nextSibling){
return getNextElement(node.nextSibling);
}
return null;
}
/* CSS와 DOM연동하기 - 반복되는 style 주기 - 목록 중 짝수 번째 항목에 style을 지정*/
function stripeTables(){
if(!document.getElementsByTagName) return false;
var tables = document.getElementsByTagName("table"); // 모든 table에 대해서
for(var i=0 ; i< tables.length; i++){
var odd = false;
var rows = tables[i].getElementsByTagName("tr"); // table내 모든 tr에 대해서
for(var j=0; j<rows.length; j++){
if(odd == true){ // 짝수이면 backcolor를 변경한다.
rows[j].style.backgroundColor = "#ffc";
odd = false;
} else {
odd = true;
}
}
}
}
/* DOM예제 3 - Tooltip*/
var toolTip = new Tooltip();
function show(){
toolTip.show('ToolTip입니다', 100, 100);
}
function hide(){
toolTip.hide();
}
function Tooltip(){
this.tooltip = document.createElement("div");
this.tooltip.style.position = "absolute";
this.tooltip.style.visibility = "hidden"; // hidden상태로 시작
this.tooltip.className = "tooltipShadow"; // css 조작할 수 있게 css클래스 이름 지정
this.content = document.createElement("div"); // 내용 부분을 위한 div생성
this.content.style.position = "relative"; // 상대 위치로 지정
this.content.className = "tooltipContent";
this.tooltip.appendChild(this.content); // 그림자 위에 내용을 추가
}
Tooltip.prototype.show = function(text, x, y){
this.content.innerHTML = text; // tooltip의 text 설정
this.tooltip.style.left = x + 'px';
this.tooltip.style.top = y + 'px';
this.tooltip.style.visibility = 'visible'; // 보이게 한다.
//아직 툴팁이 문서에 추가되지 않았다면 이를 문서에 추가한다,
if(this.tooltip.parentNode != document.body){
document.body.appendChild(this.tooltip);
}
};
Tooltip.prototype.hide = function(){
this.tooltip.style.visibility = "hidden"; // 감춘다
}
/* DOM예제 4 - sun earth moon*/
window.onload = function(){
var sun = document.getElementById('sun'); // 변수선언
var earth = document.getElementById('earth');
var moon = document.getElementById('moon');
sun.style.position = 'absolute'; // 문서 객체의 스타일 속성을 변경
earth.style.position = 'absolute';
moon.style.position = 'absolute';
sun.style.left = 250 + 'px';
sun.style.top = 200 + 'px';
var earthAngle = 0;
var moonAngle = 0;
setInterval(function(){
var earthLeft = 250 + 150 * Math.cos(earthAngle); // 각도로 지구와 달의 좌표를 구함.
var earthTop = 200 + 150 * Math.sin(earthAngle);
var moonLeft = earthLeft + 50 * Math.cos(moonAngle);
var moonTop = earthTop + 50 * Math.sin(moonAngle);
// 위치를 이동
earth.style.left = earthLeft + 'px';
earth.style.top = earthTop + 'px';
moon.style.left = moonLeft + 'px';
moon.style.top = moonTop + 'px';
// 각도를 변경
earthAngle += 0.1;
moonAngle += 0.3;
}, 1000/30);
};
/* Event예제 - event안에 자바스크립트 코드 넣는 예제들*/
document.f1.b1.onclick = function(){alert('Thanks!!'); }
var b = document.myform.mybutton;
var oldHandler = b.onclick;
function newHandler(){
}
b.onclick = function() { oldHandler();newHandler(); }
/*예외 예제*/
try{
try{
throw new Error("oops");
}
finally{
console.log("finally");
}
}
catch(ex){
console.log("outer", ex.message);
}
try{
var array = new Array(9999999999);
} catch(exception){
console.log('11: ' + exception.message);
console.log('22: ' + exception.description);
console.log('33: ' + exception.name);
}
try{
try{
throw new Error("oops");
}
catch(ex){
console.log("inner", ex.message);
}
finally{
console.log("finally");
}
}
catch(ex){
console.log("outer", ex.message);
}
try{
try{
throw new Error("oops");
}
catch(ex){
console.log("inner", ex.message);
}
finally{
console.log("finally");
}
}
catch(ex){
console.log("outer", ex.message);
}
</script>
</head>
<body>
<input type="button" value="LinkedList 객체를 만들기" onClick="question1()" />
<br><br><br>
1. DOM예제 - 줄바꿈시 childnode값 변경됨(엔터도 포함)
<ul id="myList"><li>Coffee</li><li>Tea</li><li>Milk</li></ul>
<button onClick="myFunction()">Try it</button> <!-- coffee가 water로 바뀜 -->
<br><br><br>
2. 문서의 노드순회
<!--
<body onload="alert(countTags(document))">this is a <i>sample</i>document. <!-- document 문서의 최상단 -->
-->
<br><br><br>
3. event예제
<!--
<body onload='test1()'>
<div id='a'>a Click하세요
<div id='b'>b Click하세요
<div id='c'>c Click하세요</div>
</div>
</div>
<br><br><br>
4. DOM예제2
<body onload='test()'>
<div id="parentElement">
<span id="childElement">foo bar</span>
</div>
-->
<br><br><br>
4. DOM예제2 - 노드제거
<p>포그바</p>
<p id="demo">click</p>
<button onClick='test4()'>remove</button> <!-- 누르면 click 삭제 -->
<br><br><br>
4. DOM예제2 - 속성제거
<h1 id="demo" class="cls1">click the class attribute</h1> <!-- 빨간색 속성들어간거 삭제됨 -->
<button onClick='test5()'>remove2</button>
<br><br><br>
4. DOM예제 - child제거
<ul id="myList2"><li>Coffee</li><li>Tea</li><li>Milk</li></ul>
<button onClick="test6()">remove3</button> <!-- 누르면 목록 위부터 한개씩 삭제 -->
<br><br><br>
5. DOM문제
<!--
<body onload="upcase(document)">
<div>
<h1>aa</h1>
<h2>bb</h2>
</div>
<div>
<h1>cc</h1>
<h1>dd</h1>
</div>
-->
<br><br><br>
6. DOM문제
<!--
<body onload="styleHeaderSiblings()">
<h1>첫번째 제목</h1>
<p>이것은 첫번째 단락입니다.</p>
<p>테스트1</p>
<h1>두번째 제목</h1>
<p>이것은 두번째 단락입니다.</p>
<p>테스트2</p>
-->
<br><br><br>
7. DOM예제 3 - Tooltip
<button onClick="show()">show</button>
<button onClick="hide()">show</button>
<br><br><br>
8. DOM예제 4 - sun earth moon
<h1 id="sun">@</h1>
<h1 id="earth">O</h1>
<h1 id="moon">*</h1>
<br><br><br>
9. Event예제 - event안에 자바스크립트 코드 넣는 예제들
<input type="button" value="9번" onclick="if(window.numclicks)numclicks++; else numclicks=1; this.value='Click#'+numclicks;">
<!-- 누를때마다 버튼의 숫자 값 증가 -->
<form name="f1">
<input name='b1' type='button' value='Press Me' >
</form>
<form name='action.do' onsubmit="if(this.elements[0].value.length == 0) return false;">
<input type="text">
</form>
</body>
</html>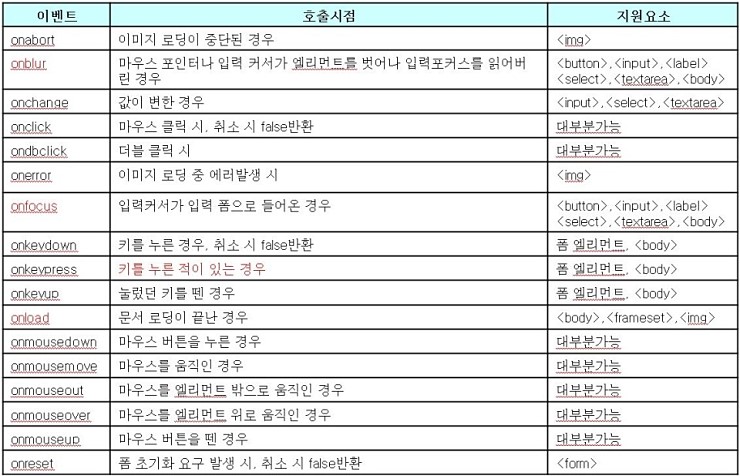
'Bitcamp > BITCAMP - Front Web' 카테고리의 다른 글
| 12일차 jQuery (0) | 2019.09.16 |
|---|---|
| 11일차 jQuery (0) | 2019.09.11 |
| JavaScript - Object 객체, DOM (0) | 2019.09.09 |
| JavaScript - 내장함수, 객체, 생성자 함수, 캡슐화, 상속(호출), 기본자료형 (0) | 2019.09.06 |
| JavaScript - 클로저, Scope (0) | 2019.09.05 |
<%@ page language="java" contentType="text/html; charset=UTF-8"
    pageEncoding="UTF-8"%>
<!DOCTYPE html>
<html>
<head>
<meta charset="UTF-8">
<title>0909실습</title>
<script type="text/Javascript">

/*문제1*/
/*
function Stack(){ // stack 생성자 함수
	this.stack = [];
	this.top = 0;
	this.push = push;
	this.pop = pop;
	this.peek = peek;
	this.isEmpty = isEmpty;
	this.size = size;
	this.print = print;
}

function size(){
	return this.top;
}

function isEmpty(){
	return (this.stack.length == null);
}

function push(a){
	this.stack[this.top++] = a;
}

function peek(){
	return this.stack[this.top-1];
}

function pop(){
	this.stack[--this.top];
}

function print(){
	for(var i =0; i<this.top; i++){
		document.write(this.stack[i] + "<br>");
	}
}

function question1(){
	var stack = new Stack();
	console.log(stack.isEmpty()); // 결과는 true
	stack.push(5);
	stack.push(8);
	console.log(stack.peek()); // 결과는 8
	stack.push(11);
	console.log(stack.size()); // 결과는 3
	console.log(stack.isEmpty()); // 결과는 false
	stack.push(15);
	stack.pop();
	stack.pop();
	console.log(stack.size()); // 결과는 2
	stack.print(); // 결과는 5, 8
}
*/

/*문제2*/
/*
function Queue(){ // Queue 생성자 함수
	this.queue = [];
	this.front = 0;
	this.enqueue = enqueue; // 넣는것
	this.dequeue = dequeue; // 빼는 것
	this.isEmpty = isEmpty;
	this.size = size;
	this.print = print;
}

function enqueue(a){
	this.queue.push(a);
}

function dequeue(){
	return this.queue.shift();
}

function front(){
	return this.queue[0];
}

function size(){
	return this.queue.length;
}

function isEmpty(){
	return (this.queue.length == 0); // null로 하면 결과 false로 나옴.
}

function print(){
		console.log(this.queue.toString());
}

function toString(){
	return this.queue.toString();
}

function question2(){
	var queue = new Queue();
	console.log(queue.isEmpty()); //결과는 true
	queue.enqueue("John");
	queue.enqueue("Jack");
	queue.print(); // 결과는 John,Jack
	queue.enqueue("Camila");
	queue.print(); // 결과는 John,Jack,Camila
	console.log(queue.size()); //결과는 3
	console.log(queue.isEmpty()); //결과는 false
	queue.dequeue();
	queue.dequeue();
	queue.print(); // 결과는 Camila
}
*/

/*문제3*/
function Set(){ // set 생성자 함수
	this.set = {};
	this.add = add; // 넣는것
	this.remove = remove; // 빼는 것
	this.has = has; // 존재여부확인
	this.size = size;
	this.values = values;
	this.clear = clear;
}

function add(a){
	if(!this.has(a)){
		this.set[a] = a;
		return true;
	}
	return false;
}

function remove(a){
	if(this.has(a)){
		delete this.set[a];
		return true;
	}
	return false;
}

function clear(){
	this.set = {};
}

function size(){
	return Object.keys(this.set).length;
}

function has(a){
	return a in this.set;
}

function values(){
	return this.set;
}

function union(otherSet){
	var unionSet = new Set();
	var values = this.values();
	for(var i=0; i<values.length; i++){
		unionSet.add(values[i]);
	}
	values = otherSet.values();
	for(var i =0; i<values.length; i++){
		unionSet.add(values[i]);
	}
	return unionSet;
}

function question3(){
	var set = new Set();
	set.add(1);
	console.log(set.values()); //결과는 ["1"]
	console.log(set.has(1));   //결과는 true
	console.log(set.size());   //결과는 1
	set.add(2);
	console.log(set.values()); //결과는 ["1", "2"]
	set.remove(1);
	console.log(set.values()); //결과는 ["2"]
	set.clear();
	console.log(set.values()); //결과는 []

	// Set에 union 메소드 추가하기
	var setA = new Set();
	setA.add(1);
	setA.add(2);
	setA.add(3);
	var setB = new Set();
	setB.add(3);
	setB.add(4);
	setB.add(5);
	setB.add(6);
	var unionAB = setA.union(setB); // set을 리턴
	console.log(unionAB.values());
}

/* Object 객체 예제*/
/* Object : 모든 객체가 가지고 있는 기본적인 형태. 아무것도 상속받지 않는 순수한 객체다. 자바스크립트에서는 값을 저장하는 기본적인 단위로 Object를 사용한다.
//1. defineProperty()
var object = {};
Object.defineProperty(object, 'name', {
	value:'홍길동',  // 속성값
	writable:false, // 속성값 변경여부
	enumerable: true, // for in 문에 검색여부
	configurable: false // 속성설정 변경여부
});
object.name = 'OTHER';
console.log(object.name); // 위에서 OTHER로 했어도 홍길동으로 찍힘(writable:false)
for(var i in object){
	console.log(i + ':' + object[i]); // true로 해야 찍힘
}

//1-2. defineProperties():한번에 여러 개의 property 추가
var object2 = {};
Object.defineProperties(object2, {
	name: {value:'김길동'},
	region: {value:'서울특별시'}
});

//2. get, set
var object3 = {};
var value='test';
Object.defineProperty(object3, 'name', {
	get:function(){  // value 리턴
		console.log("getter");
		return value;
	},
	set:function(newValue){   // 새로들어온값 set
		console.log("setter");
		value = newValue;
	}
});
object3.name = 'ALPHA'; // setter 호출
console.log(object3.name); // getter 호출 -> ALPHA

//3. create : 기존의 객체를 복제하고 새로운 속성을 추가하여 객체생성
// 빈 객체를 기반으로 name, region 속성을 추가하여 객체생성
var object4 = Object.create({}, {
	name: {value:'김길동', enumerable: true},
	region: {value:'서울특별시', enumerable: true},
});
console.log(Object.keys(object4)); // (2) ["name", "region"]
var person = Object.create({}, {
	gender: {value:'남자', enumerable: true},
	hobby: {value:'기타', enumerable: true},
});
console.log(Object.keys(person)); // ["gender", "hobby"]

//4. hasOwnProperty : 해당 객체의 소속인지를 체크해 볼수 있음.
// 인자로 전달된 속성의 이름이 객체의 속성인지 여부를 판단.
function Dog(color, name, age, family){
	this.color = color;
	this.name = name;
	this.age = age;
	this.family = family;
	this.breed = function(){
		return this.color + " " + this.family;
	}
}
var myDog = new Dog("검정색", "곰", 3, "불독");
myDog.hasOwnProperty("color"); // true
myDog.hasOwnProperty("class"); // 상속받은 프로퍼티 이므로, false를 반환함.

//5. propertyIsEnumerable : hasOwnProperty()가 true이면서 열거가능
function Dog(color, name, age){
	this.color = color;
	this.name = name;
	this.age = age;
}
var myDog = new Dog("흰색", "마루", 1); // color 프로퍼티의 enumerable 속성을 false로 설정함.
Object.defineProperty(myDog, 'color', {enumerable: false});
myDog.propertyIsEnumerable("color"); // false
myDog.propertyIsEnumerable("name"); // true

// 6. isPropertyOf : 특정 객체의 프로토타입 체인에 현재 객체가 존재하는지 검사
var day = new Date(); // Date 객체를 생성함
// 객체 day의 프로토타입이 Date.prototype 인지를 검사함.
Date.prototype.isPrototypeOf(day); // true
Date.prototype.isPrototypeOf(new String()); // false

// 7. isExtensible: 객체에 새로운 프로퍼티를 추가할수 있는지 여부
// preventExtensions : 새로운 프로퍼티를 추가할 수 없도록 처리함
// 객체 day에 새로운 프로퍼티를 추가할 수 있는지 검사함.
Object.isExtensible(day); // true
// 해당 객체에 새로운 프로퍼티를 추가할 수 없도록 설정함.
var myDay = Object.preventExtensions(day);
Object.isExtensible(day); // false

// 8. isSealed : 프로퍼티를 삭제 할 수 있는 지 여부
// seal : 프로퍼티를 삭제할 수 없도록 처리함
var person = {
		name: '홍길동',
		region: '서울특별시',
		hobby: '기타'
}
Object.seal(person);
delete person.name;

// 9. keys : 자신의 속성(key값)을 배열로 리턴(열거가능만)
// getOwnPropertyNames : 모든 속성을 배열로 리턴
var object = {name:'윤인성'};
Object.defineProperty(object, 'region', {
	value:'서울특별시'
});
console.log(Object.keys(object));
console.log(Object.getOwnPropertyNames(object));

/*array 객체 - 정렬*/
function Student(name, korean, math, english, science){
	//속성
	this.이름 = name;
	this.국어 = korean;
	this.수학 = math;
	this.영어 = english;
	this.과학 = science;
	// 메소드
	this.getSum = function(){
		return this.국어 + this.수학 + this.영어 + this.과학;
	};
	this.getAverage = function(){
		return this.getSum() / 4;
	};
	this.toString = function(){
		return this.이름 + '\t' + this.getSum() + '\t' + this.getAverage();
	};
}
//학생 정보 배열을 만듬
var students = [];
students.push(new Student('굴리트', 90, 91, 92, 93));
students.push(new Student('오언', 80, 91, 92, 97));
students.push(new Student('말디니', 90, 71, 92, 83));
students.push(new Student('바란', 90, 91, 62, 73));
students.push(new Student('호돈', 40, 51, 92, 43));
//정렬하고 1등부터 3등까지만 배열에 남겨둡니다.
students.sort(function (left,right){
	return right.getSum() - left.getSum();
});
students = students.slice(0,3);
// 출력
var output = '이름\t총점\t평균\n';
for(var i in students){
	output += students[i].toString() + '\n';
}
console.log(output);
/*
이름	총점	평균
굴리트	366	91.5
오언	360	90
말디니	336	84*/


/*String 예제*/
// 자바스크립트에서의 string은 원소스를 바꿀수 없음.
var str = "Please locate where 'locate' occurs!";
console.log(str.indexOf("locate")); // 7
console.log(str.indexOf("locate", 15)); // 21 시작 index 존재
console.log(str.lastIndexOf("locate")); // 21
console.log(str.slice(7, 13)); // locate
console.log(str.slice(7)); // index 7 이후의 string
console.log(str.substring(7, 13)); // locate
console.log(str.replace("Please", "Never")); // Never ~
console.log(str.toUpperCase()); // 대문자로
console.log(str.concat("", "Wow")); //  Please locate where 'locate' occurs!Wow
console.log(str.charAt(0)); // P
console.log(str.charCodeAt(0)); // 80 (UTF-16 리턴)
console.log(str[0]); // P. 값은 변경안됨
console.log(str.split("'")); // (3) ["Please locate where ", "locate", " occurs!"] arr로 리턴
console.log(str.split(""));
// (36) ["P", "l", "e", "a", "s", "e", " ", "l", "o", "c", "a", "t", "e", " ", "w", "h", "e", "r", "e", " ", "'", "l", "o", "c", "a", "t", "e", "'", " ", "o", "c", "c", "u", "r", "s", "!"]
// 구분자 없을경우는 -> 문자열을 하나씩 arr로

/*Date 예제*/
var d = new Date();
console.log(d.getFullYear()); // set으로도 쓸수 있다.
console.log(d.getMonth()+1); // +1해야 정상 월 나옴
console.log(d.getDate()); // 일
console.log(d.getHours()); // 시
console.log(d.getMinutes()); // 분
console.log(d.getSeconds()); // 초
console.log(d.getMilliseconds()); // 밀리초
console.log(d.getDay()); // 0 ~ 6 (일 ~ 토)

var d = new Date("2015-03-25");
var d = new Date("2015-03");
//YYYY-MM-DDTHH:MM:SSZ
var d = new Date("2015-03-25T12:00:00Z");

//Date 객체
// year, month, day, hours, minutes, seconds, milliseconds
// toXXXString()
var output = '';
var date = new Date();
output += '★toDateString: ' + date.toDateString() + '\n';
output += '★toGMTString: ' + date.toGMTString() + '\n';
output += '★toLocaleDateString: ' + date.toLocaleDateString() + '\n';
output += '★toLocaleString: ' + date.toLocaleString() + '\n';
output += '★toLocaleTimeString: ' + date.toLocaleTimeString() + '\n';
output += '★toString: ' + date.toString() + '\n';
output += '★toTimeString: ' + date.toTimeString() + '\n';
output += '★toUTCString: ' + date.toUTCString() + '\n';
alert(output);

//날짜간격 구하기
var before = new Date('March 1, 1991');
var interval = date.getTime() - before.getTime();
interval = Math.floor(interval / (1000*60*60*24));
console.log('interval : ' + interval + '일'); // 10419일

// 프로토 타입에 날짜 간격 구하는 메소드 추가
Date.prototype.getInterval = function(otherDate){
	var interval;
	if(this > otherDate){
		interval = this.getTime() - otherDate.getTime();
	} else {
		interval = otherDate.getTime() - this.getTime();
	}
	return Math.floor(interval / (1000*60*60*24));
};
console.log('interval2 : ' + date.getInterval(before) + '일'); // 10419일

/*Math객체*/
console.log(Math.round()); // 0 ~ 1
// min ~ max 사이 random value, min/max 모두 포함
function getRndInteger(min, max){
	return Math.floor(Math.random()* (max - min + 1)) + min;
}

/*브라우저 객체 모델*/
// history 예제 - 보안 문제 존재.
function history_back(){
	history.back();
}

function history_forward(){
	history.forward();
}

function history_go(){
	var page = document.frm.txtGo.value; // 폼이름으로 바로 접근 가능
	history.go(page);
}

/*문서 객체 모델 - DOM*/
// getElementById : ID를 통해 특정 요소노드의 Object를 리턴한다.
// getElementByTagName : 특정태그를 사용하는 요소노드들을 배열로 리턴한다.
var items = document.getElementByTagName("li"); // <li>태그에 대한 목록리스트
for(var i=0 ; i<items.length; i++){
	alert(typeof items[i]);
}
//문서 내에 모든 요소노드의 개수를 알고싶으면
document.getElementByTagName("*").length;
// 특정 요소노드 하위로 얼마나 많은 요소노드가 있는지 확인
var shopping = document.getElementById("purchase");
var items = shopping.getElementByTagName("*");

// 속성다루기
// getAttribute : 요소노드에 접근한 뒤 각 속성값들을 얻기 위해 사용
var paras = document.getElementByTagNames("p");
for(var i = 0; i < paras.length; i++){
	var title_text = paras[i].getAttribute("title");
	if(title_text) // if(title_tex!=null) 과 같은 의미
		alert(title_text);
}
// setAttribute : p태그의 title속성을 변경하고자 한다면
var shopping = document.getElementById("purchase");
shopping.setAttribute('title', 'a list of goods');
// childNodes : 요소노드의 속성으로서 모든 자식을 포함하는 배열을 리턴한다.
// 요소노드, 텍스트노드를 child배열에 포함하여 반환
// getElementByTagName은 결과를 배열로 리턴한다. body는 문서에서 하나만 존재하므로 0번째 값을 리턴하면 된다.
// body의 childNode들을 조사해 보면 body 바로 밑에 연결되어 있는 node들만 가져온다.
var body_element = document.getElementByTagName("body")[0];
var child_elements = body_element.childNodes;

for(var i = 0; i < child_elements.length; i++){
	alert(child_elements[i].nodeName); // nodeName : node의 tag명
}

</script>
</head>
<body>

	<input type="button" value="Stack 객체를 만들기" onClick="question1()" />
	<input type="button" value="Queue 객체를 만들기" onClick="question2()" />
	<input type="button" value="Set 객체를 만들기" onClick="question3()" />

	<br><br>
	<form name="frm">
	<input type="button" value="back" onClick="history_back()" />
	<input type="button" value="forward" onClick="history_forward()" />
	<br>history에 저장된 페이지수 : <script>document.write(history.length);</script>
	<br>이동하고 싶은 전 페이지수 : <input type="text" name="txtGo" value='-2' size='4'>
	<input type="button" value="go" onClick="history_go()" />
	</form>


</body>
</html>
// Date 객체 예제 결과
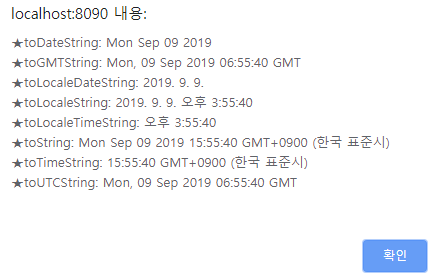
'Bitcamp > BITCAMP - Front Web' 카테고리의 다른 글
| 11일차 jQuery (0) | 2019.09.11 |
|---|---|
| JavaScript - LinkedList, nodeType(재귀), Event 핸들러, DOM (0) | 2019.09.10 |
| JavaScript - 내장함수, 객체, 생성자 함수, 캡슐화, 상속(호출), 기본자료형 (0) | 2019.09.06 |
| JavaScript - 클로저, Scope (0) | 2019.09.05 |
| 6일차 실습 (0) | 2019.09.04 |
############# 모듈(module) #############
수 많은 로직을 재사용할 수 있는 단위로 나누어,
별도의 모듈이 라는 형태로 떼어내 다른 프로그램에 부품으로 사용하는 기법.
그 기법을 모듈화(Modularization), 결과물을 모듈이라 한다.
-----main.html

<!DOCTYPE html>
<html>
<head>
    <meta charset="utf-8"/>
    <script src="greeting.js"></script> // 모듈화
</head>
<body>
    <script>
        alert(welcome());
    </script>
</body>
</html>

-----greeting.js

function welcome(){
    return 'Hello world';
}
############# 호스트 환경 #############
javascript가 구동되는 환경.
웹브라우저를 위한 언어로 시작했지만(클라이언트), 서버측에서 실행되는 javascript도 있다(서버사이드).
또한 구글의 App위에서도 돌아가는 것이 있으므로, 호스트 환경에 따라 모듈화 하는 방법을 알아야 한다.
############# 모듈과 라이브러리의 차이 #############
모듈이 프로그램의 작은 부품이라 하면,
라이브러리는 자주 사용되는 부품을 재사용하기 편하게 잘 정리한 코드의 집합.
특히 라이브러리는 많은사람들의 노력과 돈, 노우하우를 집중해 만들어 놓아 아주 완성도가 높다.
############# 라이브러리를 쓰는 이유 #############
자기혼자서 만드는 것이 여러가지 이유로 필연적이지 않으면,
다른사람이 이미 만들어 놓은것을 부품으로 조립해서 만들어 가는것이 소프트웨어를 만드는 '기본중의 기본'이다.
------------아래는 jQuery를 이용한 예제이다.


<!DOCTYPE html>
<html>
<head>
    <script src="https://code.jquery.com/jquery-1.11.0.min.js"></script>
</head>
<body>
    <ul id="list">
        <li>empty</li>
        <li>empty</li>
        <li>empty</li>
        <li>empty</li>
    </ul>
    <input id="execute_btn" type="button" value="execute" />
    <script type="text/javascript">
     $('#execute_btn').click(function(){
        $('#list li').text('coding everybody');
     })
    </script>
</body>
</html>

-------------  다음은 jQuery를 이용하지 않고 동일한 기능을 구현한 예제이다.

<!DOCTYPE html>
<html>
<body>
    <ul id="list">
        <li>empty</li>
        <li>empty</li>
        <li>empty</li>
        <li>empty</li>
    </ul>
    <input id="execute_btn" type="button" value="execute" />
    <script type="text/javascript">
    function addEvent(target, eventType,eventHandler, useCapture) {
        if (target.addEventListener) { // W3C DOM
            target.addEventListener(eventType,eventHandler,useCapture?useCapture:false);
        } else if (target.attachEvent) {  // IE DOM
            var r = target.attachEvent("on"+eventType, eventHandler);
        }
    }
    function clickHandler(event) {
        var nav = document.getElementById('list');
        for(var i = 0; i < nav.childNodes.length; i++) {
            var child = nav.childNodes[i];
            if(child.nodeType==3)
                continue;
            child.innerText = 'Coding everybody';
        }
    }
    addEvent(document.getElementById('execute_btn'), 'click', clickHandler);
    </script>
</body>
</html>
'JavaScript' 카테고리의 다른 글
| innerHTML과 outerHTML 차이 (0) | 2019.09.18 |
|---|---|
| 자바스크립트에서 replace를 replaceAll 처럼 사용하기 (0) | 2019.09.18 |
| 객체 (0) | 2019.09.08 |
| 누구나 한 번쯤은 띄워본 JavaScript 에러 TOP 10. (0) | 2019.08.30 |
| jQuery - input 쓰기, 읽기, 활성화, 비활성화 - readonly, disabled (0) | 2019.08.30 |
객체(object) : 이름이 있는 정리정돈 상자
객체에서의 인덱스는 문자임.
############# 객체 불러오기 #############
var grades = {'egoing': 10, 'k8805': 6, 'sorialgi': 80};
                key    value  key   value   key     value
object['egoing'];
object.egoing;
key값으로 문자열과 메소드가 올수 있고, 숫자열도 올 수 있지만,
object[1]은 실행 가능하고, object.1은 실행이 불가능하다.
object['egoing']의 'egoing'은 문자열이기 때문에, object['ego'+'ing']도 실행가능
(대괄호 사용시는 안에서 프로그래밍적으로도 구현가능)
############# for in 문 #############
배열은 순서가 존재하지만,
객체는 key와 value를 가지고 있을뿐이다.
객체,배열안의 값을 모두 가져올때 사용
for (* in **){
console.log(* + **[*]);
}
** 에는 객체의 이름이 오고,
* 에는 객체 안의 key값이 인자로써 변수(매개변수라고 해야하나?)안에 대입된다. -- 약속임★★★

var grades = {'egoing': 10, 'k8805': 6, 'sorialgi': 80};
for(key in grades) {
    document.write("key : "+key+" value : "+grades[key]+"<br />");
}
// 객체 안에 객체, 함수를 삽입할 수 있다.
############# this #############
this는 '소속되어 있는 객체를 가리키는 약속되어 있는 변수'
############# 객체지향 프로그래밍 #############
서로 연관되어 있는 값과 서로 연관되어 있는 처리를
하나의 그릇에 모아서 그룹핑하는 방식
'JavaScript' 카테고리의 다른 글
| 자바스크립트에서 replace를 replaceAll 처럼 사용하기 (0) | 2019.09.18 |
|---|---|
| 모듈 (0) | 2019.09.08 |
| 누구나 한 번쯤은 띄워본 JavaScript 에러 TOP 10. (0) | 2019.08.30 |
| jQuery - input 쓰기, 읽기, 활성화, 비활성화 - readonly, disabled (0) | 2019.08.30 |
| 배열 (0) | 2019.08.13 |
<%@ page language="java" contentType="text/html; charset=UTF-8"
    pageEncoding="UTF-8"%>
<!DOCTYPE html>
<html>
<head>
<meta charset="UTF-8">
<title>0906 실습</title>
<script type="text/Javascript">

/*구구단 만들기 실습*/
function calculate(gugu){
	// $("#gugu").val(gugu); jquery 방식
	// var gugu = $("#gugu").val(); jquery 방식
	var gugu = document.getElementById('gugu').value; // 자바스크립트로 input 값 가져오기
	gugu = Number(gugu);
	if(isNaN(gugu) || gugu <=0 ){ // isNaN : number가 NaN(숫자가 아님)인지 확인.(숫자 체크)
		alert('숫자를 입력해주세요');
	} else {
			document.write("<table border=1>");
			document.write("<tr>" + "<td>" + "X" + "</td>");
				for(var j=1; j<=9; j++){ // * 9까지
					document.write("<td>" + j + "</td>");
				}
				for(var i=1; i<=gugu; i++){ // 몇단까지
					document.write("<tr>" + "<td>" + i + "</td>");
					for(var j=1; j<=9; j++){ // * 9까지
						document.write("<td>" + i*j + "</td>");
					}
					document.write("</tr>");
			}
			document.write("</table>");
		}
}

/*내장함수
//타이머함수
setTimeout(function(){
	alert('3초가 지났습니다. ㅇㅂㅇ');
}, 3000) // 3초후에 함수를 실행(3000은 milesecond)

//1초마다 함수를 실행
var intervalID = setInterval(function(){
	alert('<p>' + new Date() + '</p>');
}, 1000); // 1초마다 함수를 실행 // Fri Sep 06 2019 14:25:46 GMT+0900 (한국 표준시)

//5초 함수를 실행 후, 타이머를 종료
setTimeout(function(){
	clearInterval(intervalID);
},5000);

//인코딩과 디코딩 함수
var URI = "http://hanb.co.kr?test=한글입니다.";

document.write(escape(URI)); // 적절한 정도로 인코딩
document.write(encodeURI(URI)); // 최소한의 문자만 인코딩
document.write(encodeURIComponent(URI)); // 대부분의 문자를 모두 인코딩


//코드실행함수
var willEval = '';
willEval += 'var number = 10;';
willEval += 'alert(number);';
eval(willEval); // String을 JavaScript코드로 실행 . 결과 10 alert 출력

//JavaScript 실행순서 A->C->B
//setTimeout은 script 블록이 모두 끝난 뒤에 호출
alert('A');
setTimeout(function(){
	alert('B');
}, 0);
alert('C');*/

//반복문과 콜백함수
//0,1,2 차례로 호출을 원하지만 3만 3번 호출됨
for(var i = 0; i < 3; i++){
	// (function (closed_i){ //클로저를 통해 0,1,2 가 호출되게 처리
		setTimeout(function (){
			alert(i); // alert(closed_i);
		},0);
	// })(i) //클로저를 통해 0,1,2 가 호출되게 처리
}

/*객체*/
//속성과 메소드
var person = {
		name: '홍길동',
		friend: '임꺽정',
		eat: function(food){
			alert(this.name + '이 ' + this.friend + '과 ' + food + '을 먹습니다.');
		}
};
person.eat('밥'); // 메소드 호출 : '홍길동이 임꺽정과 밥을 먹습니다.'
var output = '';
for(var item in person){ // 객체와 반복문
	output += item + ': ' + person[item] + '\n';
	// item은 name, friend, eat / person은 value
}

/*객체관련 키워드*/
// in 키워드 : 객체 내 속성존재여부 확인
output += "'name' in person: " + ('name' in person) + '\n'; // 결과 : true
// with 키워드 : 객체명 생략
with(person){
	output += 'name: ' + name + '\n'; // name: 홍길동
	output += 'friend: ' + friend + '\n'; // friend: 임꺽정
}

/*객체의 속성 추가와 제거*/
var stu = {};
stu.이름 = '피구'; // 속성 추가
stu.장래희망 = '날강두';
stu.toString = function(){ // 메소드 추가
	var answer = '';
	for(var key in this){
		if(key != 'toString'){ // toString 메소드는 출력하지 않게함.
			answer += key + '\t' + this[key] + '\n';
		}
	}
	alert(answer);
};
delete(stu.이름); // 속성제거. 배열에서의 delete는 undefined로 만드는 것.

//객체실습
var students = [];
students.push({ 이름 : '포그바', 국어: 99, 수학:88, 영어:77, 과학: 55});
students.push({ 이름 : '드록바', 국어: 89, 수학:78, 영어:67, 과학: 95});
students.push({ 이름 : '바밤바', 국어: 79, 수학:98, 영어:87, 과학: 15});
//모든 students 배열 내의 객체에 메소드를 추가합니다.
for(var i in students){
	//총점 구하는 메소드를 추가
	students[i].getSum = function(){
		return this.국어 + this.수학 + this.영어 + this.과학;
	}
	//평균을 구하는 메소드를 추가
	students[i].getAverage = function(){
		return this.getSum() / 4;
	};
}
//출력
var output = '이름\t총점\t평균\n';
for(var i in students){
	with(students[i]){
		output += 이름 + '\t' + getSum() + '\t' + getAverage() + '\n';
	}
}/*이름	총점	평균
포그바	319	79.75
드록바	329	82.25
바밤바	279	69.75*/

/*생성자 함수 : 자바의 class 와 같다. return 값이 없음. new를 통해서 생성가능. */
//객체실습 : 함수를 사용한 객체생성
function makeStudent(name, korean, math, english, science){
	var willReturn = {
			//속성
			이름 : name, 국어 : korean, 수학 : math, 영어 : english, 과학 : science,

			//메소드
			getSum: function(){
				return this.국어 + this.수학 + this.영어 + this.과학;
			},
			getAverage: function(){
				return this.getSum() / 4;
			},
			toString: function(){
				return this.이름 + '\t' + this.getSum() + '\t' + this.getAverage();
			}
	};
	return willReturn;
}

//1. 객체의 Property를 배열로 반환
function getPropertynames(o){
	var a = [];
	for(property in o) a.push(property); // 객체 o의 속성을 a 배열에 넣어라.
	return r;
}

// 2. from의 객체를 to로 Copy ( from의 프로퍼티를 to에 넣으면 됨.)
function copyProperties(from, to){
	if(!to) to = {};
	for(p in from) to[p] = from[p]; // from 에 있는 p를 반복해서 to 배열에 넣어라.
	return to;
}

// 3. From의객체를 to로 Copy하되 to에 없는 속성만 Copy
function copyUndefineProperties(from, to){
	for(p in from){ // from에 있는 p를 반복
		if(!(p in to)) to[p] = from[p]; // to에 있는 p가 아닌 경우에만 -> from의 p를 to의 p에 넣어라.
	}
}

/*생성자함수
//생성자 함수 예제1
//Circle 클래스
function Circle(radius){ // 생성자 함수 정의
	this.r = radius;
}
//클래스 프로퍼티, 생성자함수의 프로퍼티
Circle.PI = 3.14159;
//인스턴스 메소드
Circle.prototype.area = function(){return Circle.PI * this.r * this.r;}
//클래스 메소드
Circle.max = function(a,b){
	if(a.r > b.r) return a;
	else return b;
}
var c = new Circle(1.0); //인스턴스 생성
c.r = 2.2; //인스턴스 프로퍼티
var a = c.area(); // 인스턴스 메소드
var x = Math.exp(Circle.PI); // 클래스 프로퍼티
var d = new Circle(1.2); // 다른 인스턴스
var bigger = Circle.max(c, d); // 클래스 메소드

/*캡슐화*/
function Rectangle(w,h){// 변수를 선언
	var width = w;
	var height = h;
	//메소드선언
	this.getWidth = function(){return width;};
	this.getHeight = function(){return height;};
 // this.area = function(){return this.width * this.height;} // 생성자 함수에 메소드 속성 추가
	this.setWidth = function(w){
		if(w<0){
			throw '길이는 음수일 수 없습니다.';
		} else {
			width = w;
		}
	};
	this.setHeight = function(h){
		if(w<0){
			throw '길이는 음수일 수 없습니다.';
		} else {
			height = h;
		}
	}
}
Rectangle.prototype.getArea = function(){ // prototype에서 객체의 this에 접근가능
	return this.getWidth() * this.getHeight();
};
// var a = r.area(); //각 인스턴스들이 공유해야 하는 Property나 메소드를 정의(생성자 함수를 더 효율적으로 개선 :prototype사용)
var rectangle = new Rectangle(5, 7); //변수를 선언. property를 초기화하며 new와 함께 사용된다.
rectangle.setWidth(5); // 음수면 '길이는 음수일 수 없습니다.' 출력
alert('AREA : ' + rectangle.getArea()); // AREA : 35

/*상속 - JavaScript에서 정확한 상속방법은 없다.
instanceof 키워드로 특정 객체의 instance인지 확인 */
function Square(length){
	this.base = Rectangle; // 생성자로 Rectangle를 속성으로
	this.base(length, length); // 생성자 함수 Rectangle 호출
}
Square.prototype = Rectangle.prototype;
Square.prototype.constructor = Square; // 생략가능. constructor : 자신의 원소를 물어볼때 쓰임.
var square = new Square(5);
alert(square instanceof Rectangle); // 상속확인 : 결과값 true

/*상속예제
//모든 함수는 apply(), call() 메소드가 존재한다.
// 함수는 f()에 두 숫자를 전달하고 이 함수가 객체 o의 메소드 인 것처럼 호출할 경우
// 첫번째인자 : 함수가 소속되어 호출될 객체
// 나머지인자 : 함수의 전달인자
f.call(0, 1, 2);

//다음코드와 동일
o.m = f;
o.m(1,2);
delete o.m;

//apply()는 call()과 유사하지만 전달인자를 배열로 지정하는 것이 다름
f.apply(o, [1.2]);*/
//===============================
/*prototype(원형) : 상속의 구체적인 수단*/
// prototype에 저장된 속성들은 생성자를 통해서 객체가 만들어질 때 그 객체에 연결됨(prototype chain)
function MyParent(){
	this.property1 = "부모속성";
	console.log('Parent');
}
MyParent.prototype.info = function(){
	console.log('property1: ' + this.property1);
};
function MyChild(){
	this.property2 = "자식속성";
	console.log('Child');
}
MyChild.prototype = new MyParent(); //부모클래스 상속
MyChild.prototype.constructor = MyChild(); // 생성자 설정
MyChild.prototype.info = function(){ // 오버라이딩을 통한 기능확장 MyChild.prototype 은 MyParent를 가리킨다.
	MyParent.prototype.info.call(this); // 부모클래스의 info함수 호출
	console.log('info기능확장');
}
var child = new MyChild(); // 자식인스턴스 생성
child.info(); // 자식정보출력

/*기본자료형과 객체*/
// 기본자료형에 메소드 추가
var primitiveNumber = 273;
var objectNumber = new Number(273);
// Number 객체에 메소드를 추가하면 number dataType인 primitiveNumber도 추가된 메소드 사용가능
Number.prototype.method = function(){
	return 'Method on Prototype';
};
// 메소드 실행
var a1 = '';
a1 += primitiveNumber.method() + '\n';
a1 += objectNumber.method();

/*자료형 구분*/
//객체의 속성인 Constructor를 이용하면 같은 Type인지 비교하는 것이 명확함
var numberFromLiteral = 273;
var numberFromObject = new Number(273);
//자료형 확인
if(numberFromLiteral.constructor == Number){
	alert('numberFromLiteral은 숫자입니다.'); // 얼럿뜸
}
if(numberFromObject.constructor == Number){
	alert('numberFromObject는 숫자입니다.'); // 얼럿뜸
}

</script>
</head>
<body>

	몇단을 만들까요?<input type="text" id="gugu" name="gugu" >
	<input type="hidden" id="gugu" name="gugu" />
	<input type="button" id="make" name="make" value="구구단 만들기" onClick="calculate(gugu)"/>

</body>
</html>'Bitcamp > BITCAMP - Front Web' 카테고리의 다른 글
| JavaScript - LinkedList, nodeType(재귀), Event 핸들러, DOM (0) | 2019.09.10 |
|---|---|
| JavaScript - Object 객체, DOM (0) | 2019.09.09 |
| JavaScript - 클로저, Scope (0) | 2019.09.05 |
| 6일차 실습 (0) | 2019.09.04 |
| JavaScript - 자료형 (0) | 2019.09.03 |
<%@ page language="java" contentType="text/html; charset=UTF-8"
    pageEncoding="UTF-8"%>
<!DOCTYPE html>
<html>
<head>
<meta charset="UTF-8">
<title>0905실습</title>
<script type="text/javascript">

//1. 단어 s의 가운데 글자를 반환하는 함수 (단어의 길이가 짝수라면 가운데 두 글자를 반환)

function calculate1(s) {
	var input = prompt("가운데 글자 반환함수", "글자 s를 입력해주세요.");
	if (input.length % 2 == 0){
		alert(input.substring((input.length/2)-1, (input.length/2)+1));
	}else{
		alert(input.substring((input.length/2), (input.length/2)+1));
	}
}


//2. 배열 arr의 각 원소는 숫자 0부터 9까지로 이루어져 있습니다.
// 배열 arr에서 연속적으로 나타나는 숫자는 하나만 남기고 전부 제거하여 리턴하는 함수
function calculate2(arr) {
	var arr = [0,1,1,2,3,4,5,7,7,9];
	var answer = [];
	var length = arr.length;
	// for문에서 arr.length 사용하면 왜곡이 되므로
	// length 변수 받아서 쓰던가 var i in arr 로 써라.
	for(i=0; i<length; i++){ // var i in arr 로 쓰면 작동안됨.
		if(arr[i] !== arr[i+1]){
			answer.push(arr[i]);
		}
	}
	alert(answer);
}


//3. 두 정수 a, b가 주어졌을 때 a와 b 사이에 속한 모든 정수의 합을 리턴하는 함수
function calculate3(a, b) {
	var input = prompt("a와 b 사이에 속한 모든 정수의 합을 리턴하는 함수", "a를 입력해주세요.");
	var input1 = prompt("a와 b 사이에 속한 모든 정수의 합을 리턴하는 함수", "b를 입력해주세요.");
	var arr = [input, input1];
	var answer = 0;
	if(arr[0] == arr[1]){
		answer = arr[0];
	} else {
		for(var i = arr[0]; i<=arr[1]; i++){
			answer += Number(i); // Number로 변환해야 숫자로 인식됨.
		}

	}
	alert(answer);
}


//4. 정수를 담고 있는 배열 arr의 평균값을 return하는 함수
function calculate4(arr) {
	var arr = [1,2,3,4,5,6,7,8,9,10];
	let result = 0; // let은 변수에 재할당이 가능
	for(let i = 0; i<arr.length; i++){
		result += arr[i];
	}
	alert(result/arr.length);
}

/* ★★★★★★★★★★★★★★★★ 클로저 ★★★★★★★★★★★★★★★ */
// 실행이 끝난 함수의 스코프를 참조할 수 있는 함수
function parent() {
  var a = 'Parent is done';
  function child() {
    console.log(a);
  }
  return child;
}
var closure = parent();
closure();

위 내부함수의 정의대로라면 parent 의 내부함수인 child() 는 외부에서 접근이 불가능하다.
하지만 return 값에 child 를 넘김으로써 외부에서도 child 를 호출할 수 있게 된다.
따라서, child() 에서 parent 의 값을 참고하고 있다면,
child() 를 밖에서 호출함으로써 parent() 의 변수에 접근이 가능하게 된다. 이것이 클로져

// 클로저 : 지역변수의 범위를 벗어나서 사용가능하게 해줌.
function test(name){
	var output = 'Hello' + name + '...!'; //private 멤버변수
	//내부 메소드에서는 private 멤버변수 사용가능
	return function(){ // 내부메소드를 통해서 메모리 할당됨
		alert(output);
	};
}

// 지역변수 output은 test()가 호출될때 생성(메소드가 끝났음에도 사용가능)
test('JavaScript')(); // 결과값 : HelloJavaScript...! ( 함수가 리턴되므로)

// 전역변수는 var문을 생략해도 되지만 지역변수는 반드시 var문을 써야한다.
scope = "global";
function checkscope(){
	scope = "local"; // 전역변수를 바꾸어버림
	myscope = "local"; // 새로운 전역변수 생성
}

//클로저를 사용하여 Counter 만들기
//아래소스는 외부에서 counter값을 변경할 수 있는 문제 존재
uniqueInteger.counter = 0;
function uniqueInteger(){
	return uniqueInteger.counter++;
}
//클로저를 이용해 해결한 소스
var uniqueID = (function(){
	var id = 0; // private 속성을 가진다. 함수만이 접근가능
	// uniqueID에 저장되는 것은 값이 아닌 중첩된 함수이다.
	return function(){return id++;} // 값을 증가시켜서 반환
})();

for(var i=0; i<3; i++){
	alert(uniqueID()); // 결과값 : 0, 1, 2
}

// 클로저 : 중첩함수
function makefunc(x){
	return function(){return x;}
}
	//리턴된 함수를 배열요소에 저장
	var a = [makefunc('x'), makefunc('y'), makefunc('z')];
	alert(a[0]()); // x출력
	alert(a[1]()); // y출력
	alert(a[2]()); // z출력

// 클로저를 사용한 private 멤버변수
function makeProperty(o, name, predicate){ // o는 object
		var value; //private 변수
		//getter메소드
		o['get'+ name] = function(){return value;};
		//setter메소드
		o['set'+ name] = function(v){
			if(predicate && !predicate(v)) // 메소드가 존재하고 false를 리턴하면
				throw 'set'+name+': invalid value' + v;
			else
				value = v;
		}
	}
	var o = {};
	//Name Property 추가, set은 string만 가능
	makeProperty(o, 'Name', function(x){return typeof x == 'string';});
	o.setName('Frank'); // 값 설정
	console.log(o.getName()); // 값 출력 : Frank 찍힘.

// 클로저 문제
var counter = (function(){
		var a = 0;
		return {
		inc : function(){return a++;}, // 메소드 선언시 ':' 을 사용한다.
		dec : function(){return a--;},
		val : function(){return a;}
		};
	})();
counter.inc(); // 1증가
counter.inc(); // 1증가
counter.dec(); // 1감소
console.log(counter.val()); // 1출력

/* Scope 예제 */
// 함수단위 유효범위
function scopeTest(){
	var a = 0;
	if(true){
		var b = 0;
		for(var c=0; c<5; c++){
			console.log("c1= " + c); // 0, 1, 2, 3, 4, 5
		}
		console.log("c2 = " + c); // 5
	}
	console.log("b = " + b); // 결과값 0. block외부에서 b에 접근가능 => 블록단위 유효범위가 없다.
}
scopeTest();

// 변수명이 동일할 때는 가장 가까운 범위의 변수를 참조한다.
var scope = 10;
function scopeExam(){
	var scope = 20;
	console.log("scope = " + scope);
}
scopeExam(); // 20. 20이 더 가까움

// var 키워드를 생략하면 전역변수로 설정된다.
function scopeExam(){
	scope = 20; // var가 없으므로 전역변수화 됨.
	console.log("scope = " + scope);
}
function scopeExam2(){
	console.log("scope = " + scope);
}
scopeExam(); // 20
scopeExam2(); // 20

// 변수 선언문을 끌어 올린다.
function hoistingExam(){
	console.log("value = " + value); // 아래 선언된 변수를 사용, undefined 출력
	var value = 10;
	console.log("value = " + value); // 10출력
}
hoistingExam();


</script>
</head>
<body>

	<input type="button" value="문제1번" onClick="calculate1()"><br><br>
	<input type="button" value="문제2번" onClick="calculate2()"><br><br>
	<input type="button" value="문제3번" onClick="calculate3()"><br><br>
	<input type="button" value="문제4번" onClick="calculate4()"><br><br>

	<input type="button" value="실습" onClick="makeProperty()"><br><br>

</body>
</html>'Bitcamp > BITCAMP - Front Web' 카테고리의 다른 글
| JavaScript - Object 객체, DOM (0) | 2019.09.09 |
|---|---|
| JavaScript - 내장함수, 객체, 생성자 함수, 캡슐화, 상속(호출), 기본자료형 (0) | 2019.09.06 |
| 6일차 실습 (0) | 2019.09.04 |
| JavaScript - 자료형 (0) | 2019.09.03 |
| 5일차 (0) | 2019.09.03 |


